
0
Owner's of the Casio Musical Toy Instrument Casio CTK-6200 gave it a score of 0 out of 5. Here's how the scores stacked up:
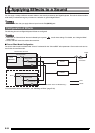

Applying Effects to a Sound
E-36
5.
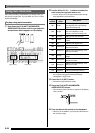
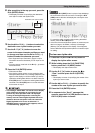
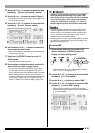
Use the dial or R-14 (–, +) buttons to select the
preset DSP you want to use.
• DSPs with the leading numbers 001 through 100 (and
“ton”) are preset DSPs. See “Preset DSP List” on page
E-119 for information about preset DSP numbers and
names.
• DSP types with the leading numbers 101 through 200
are user DSPs. For details, see “Creating a User DSP”
(page E-36).
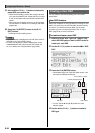
6.
Press the C-5 (EFFECT) button or the R-15
(EXIT) button.
• This exits the effect setting screen.
• A pointer indicator is displayed next to DSP when “DSP” is
selected for the “Chorus/DSP” setting.
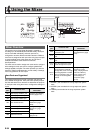
• You also can adjust how a DSP is applied (DSP output
enabled/disabled, DSP output volume, DSP output pan,
etc.) For details, see “Using the Mixer” (page E-38).
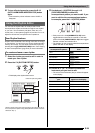
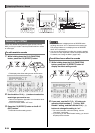
You can create a user DSP by editing one of the built-in
preset DSPs.
DSP areas numbered 101 through 200 are for storage of user
DSPs. You can have up to 100 user DSPs stored in memory
at one time. To recall a stored user DSP, use the same
procedure you use to recall a preset DSP. See “To use a
DSP” (page E-35) for more information.
1.
Referring to the “DSP Type List” (page E-120),
select the DSP type you want to edit in order to
create your user DSP.
2.
Use the R-17 (y) button to move the 0 to “DSP
Edit”.
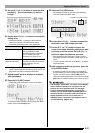
3.
Press the R-16 (ENTER) button.
• This displays page one of the DSP editor screen. Use
this screen to select the DSP type.
• You can use the R-17 (u, i) buttons to scroll
between pages.
4.
Use the dial or R-14 (–, +) buttons to select a
DSP type.
Creating a User DSP
User DSP Numbers
To create and save a user DSP
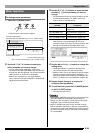
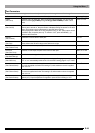
Total number of pages
Currently displayed page
DSP type DSP number


Find Your Products By Category
Please Login
