

0
Owner's of the Fender Speaker Passport Conference Portable PA System gave it a score of 0 out of 5. Here's how the scores stacked up:
Before turning on the Power, read the safety
warnings on pages 3 and 4.
It is wise to establish a routine for connecting and
powering up your sound system. Provided you have a
properly grounded A/C outlet or outlet strip with
sufficient power handling capacity, plug all sound
system equipment into the same outlet or strip. This
will enhance system safety and performance. Take
care that the AC circuit is capable of handling the peak
power demands of your system. Consult the product
handbooks or a qualified electrician if in doubt.
When setting up for a new event be sure to follow
these simple set-up guidelines:
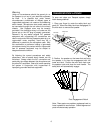
1. All cables and microphones can be found in the
rear storage compartment of the Passport tower. To
access this compartment, simply lift the latch and pull
open the storage door.
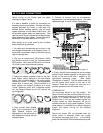
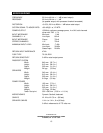
2. First, turn all channel Level, VIP (channel 1 ONLY)
and Rev/Aux controls to their full counterclockwise
(OFF) position. Next, place all EQ and Pan controls at
12 o’clock in their center notched positions.
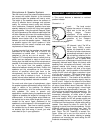
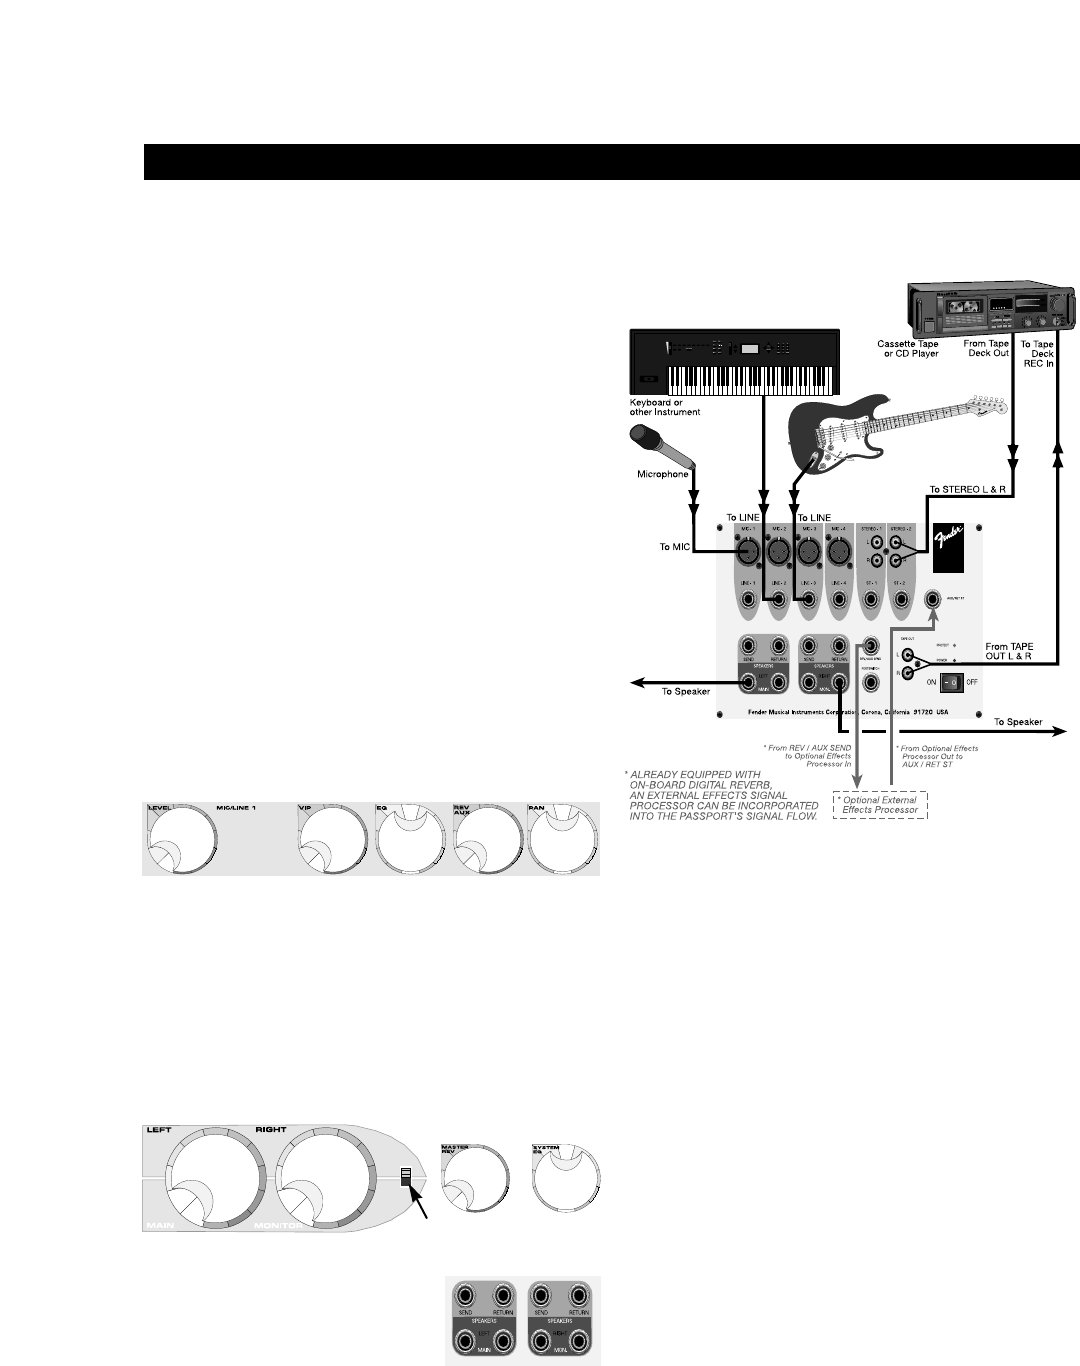
3. Select the desired operating mode on the front
panel “Mode” switch adjacent to the right Master
control. With the Mode switch in its upper position
operation is normal - L-R Stereo. (This configuration
covers 90% of normal use.) With the switch in its
lower position the Passport functions as a mono
“house” (audience) mixer, with a separate monitor
mix. Your Passport System is now in its “nominal” set
up configuration.
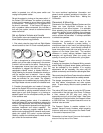
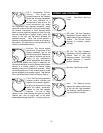
4. Next, connect each speaker
cable to the appropriate Left &
Right Speaker outputs (red
background) on the tower and on
each speaker front panel with the
enclosed cables.
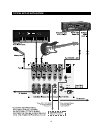
5. Connect all sources such as microphones,
keyboards etc., into the appropriate inputs. (For more
details see page 12, Input / Output Connections).
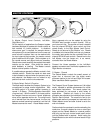
6. Finally, check the local voltage and set the voltage
selector switch located adjacent to the power input
socket on the rear of the mixer / amplifier to the
appropriate operating range. (See Safety
Precautions on page 5.) Plug the power cable into
the IEC (power cord) socket on the rear of the
Passport Tower and connect the other end to a
properly grounded 3 wire AC power outlet.
POWERING UP
Turn the Power Switch to the ON position. The
Power LED will illuminate and the system will turn on.
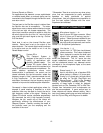
If other powered equipment is to be attached to the
system, it is always advisable to turn on your
Passport last. In this way any transient spikes and
thumps caused by other equipment will not be
amplified and sent to your system speakers. For the
same reasons it is advisable to turn off your Passport
system first before turning off the attached
equipment.
Should the Protect LED not illuminate when the
power switch is operated check your power
connections thoroughly, and re-try. In the unlikely
event that the Protect LED illuminates when the power
SET-UP AND CONNECTIONS
POWERPOWER
Stereo CassetteStereo Cassette
PLA
Y
RECORD
PLAY
RECORD
P
AUSE
ST
OP
REW
FF
PAUSE
STOP
REW
FF
9
O
1
9
O
1
0
1
2
2
3
4
0
1
2
2
3
4
LEFT
RIGHT
LEFT
RIGHT
0
1
2
1
2
3
4
-5
0
1
2
1
2
3
4
-5
0
1
2
1
2
3
4
-5
0
1
2
1
2
3
4
-5
T
APE SELECT
NORMAL
C O
r 2
MET
AL
TAPE SELECT
NORMAL
C O
r 2
METAL
RECORD LEVEL
L
R
RECORD LEVEL L R
Value
1
Value
2
Value
3
Value
4
Value
5
Value
6
Value
7
Value
8
Value
A
Value
B
Volume
Value
Yes
No
This Illustration was done
by Phil Sanchez
January 27, 1997
7
Mode switch
This full-page illustration can be found on page 14.


Find Your Products By Category
Please Login
