
0
Owner's of the Samson Car Speaker Auro Active Subwoofer gave it a score of 0 out of 5. Here's how the scores stacked up:
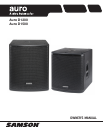
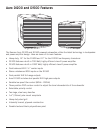


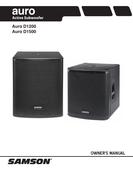
Auro Active Subwoofer
7
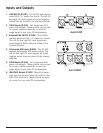
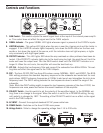
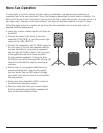
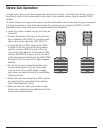
Controls and Functions
7. GAIN Control - This control adjusts the overall signal level at the input of the internal power amplifi-
er. This control does not affect the signal sent to the THRU outputs.
8. SIGNAL Indicator - The green SIGNAL LED lights whenever signal is present at the D1200’s inputs.
9. LIMITER Indicator - This yellow LED lights when the amp is near the clipping point and the limiter is
engaged. If the LIMITER indicator lights frequently, turn down the GAIN control on the Auro sub-
woofer or turn down the signal at the source, until the indicator does not light anymore, or lights
only occasionally with high signal peaks.
10. PROTECT Indicator - This LED lights RED when the amp overheats or other problems have been de-
tected. If the PROTECT indicator lights due to the level being too high, the amplifier will limit the
audio and lower the output level. Turn the GAIN control down until the PROTECT indicator is no
longer lit. When the unit cools, the amplifier will raise the level back up.
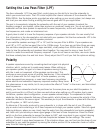
11. LPF (Hz) - Adjusts the low frequency filter end range of the subwoofer from 80Hz-200Hz. This set-
ting does not affect the signal sent to the THRU outputs.
12. DSP - The Auro D1200 DSP has three EQ contour curves: NORMAL, DEEP, and BOOST. The NOR-
MAL setting produces the standard frequency response for the subwoofer and works best for most
applications. BOOST enhances frequencies at 100Hz to add punch and strengthen the kick drum
frequency band. The DEEP setting extends the low frequencies down to widen the range of the
subwoofer.
Note: While the DEEP setting might increase the low frequency response of the Auro D1200, low
frequencies use more power and reduce the overall headroom of the amplifier.
13. POLARITY Switch - Use this switch to set the polarity of the amplified signal. In the NORMAL set-
ting, there is no change to the signal. When the switch is set to the in REVERSE setting, the sig-
nal’s polarity is changed by 180°. The setting of the POLARITY switch has no effect on the signal
sent to the THRU outputs.
14. AC INPUT - Connect the supplied standard IEC AC power cable here.
15. POWER Switch - Switches on the Auro D1200 main power.
16. Voltage Switch - Slide to change the operating voltage from 115 to 230 volts.
7
8
9
10
11
12
13
14 15
16


Find Your Products By Category
Please Login
