
0
Owner's of the Sony Camcorder HDRMV1 gave it a score of 0 out of 5. Here's how the scores stacked up:
HDR-MV1 4-479-706-11(1)
4-479-706-11(1)
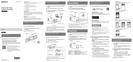
Charging the battery pack
1
Turn off the camcorder by pressing the POWER
button.
2
Open the terminal cover of the camcorder.
3
Connect the camcorder to a running computer
using the USB cable.
POWER button
CHG (charge) lamp
Terminal cover
USB cable (supplied)
USB terminal
(Computer)
Fully charging the battery pack takes approximately 245 minutes when
connected to a computer or approximately 155 minutes when using the
AC-UD10 AC Adaptor (sold separately).
When you use a fully charged battery pack, available recording time is
approximately 130 minutes (continuous recording time) or 75 minutes
(typical recording time), or available playback time is approximately 210
minutes (at default settings).
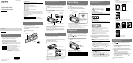
Inserting a memory card
1
Open the memory card cover.
2
Insert the memory card straight in the direction
illustrated until it clicks.
3
Close the memory card cover.
Memory card cover
microSD memory
card
“Memory Stick
Micro”media
Terminal
Printed
surface
To eject the memory card, push it in lightly once.
microSD memory cards, microSDHC memory cards, microSDXC memory
cards and “Memory Stick Micro”(Mark2) media are compatible with the
camcorder.
Operation with all memory cards is not assured.
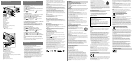
Recording
1
Turn on the camcorder by pressing the POWER
button.
2
Press START/STOP to start recording.
To stop recording, press START/STOP again.
POWER button
START/STOP
button
Select by moving multi-
selector in directions show
by arrows, then finalize by
pressing center.
Multi-selector
When you turn on the power for the first time, the date and time setting
screen is displayed. Configure settings using the multi-selector.
The camcorder can record MP4 movies.
Noise may be recorded when recording by holding the camcorder because
it is equipped with a high-sensitivity microphone.
The LCD screen will be dark during recording (at default settings).
Playback
1
Turn on the camcorder by pressing the POWER
button.
2
Press the button on the camcorder to enter
the playback mode.
3
Select contents you want to play back using
the multi-selector, then press the center of the
selector.
Multi-selector
button
POWER button
Main buttons for playback operations
Volume
/
Previous/Next
Delete
/
Fast-reverse/fast-forward
Stop
/
Pause/Play
Transferring movies to your
smartphone (Wi-Fi)
1
Install the application on your smartphone.
Android 2.3 or later
(Android 4.0 or later if using NFC)
Search for and install PlayMemories Mobile from Google
play.
iOS 4.3 or later
(NFC is not available.)
Search for and install PlayMemories Mobile from App
Store.
For details on PlayMemories Mobile, visit the following URL.
(http://www.sony.net/pmm/)
If PlayMemories Mobile is already installed in your smartphone,
update the software to the latest version.
This application is not guaranteed to work on all smartphones and
tablets.
The operation methods and display screens for the application are
subject to change without notice by future upgrades.
The information on supported OS versions is current as of
September 1, 2013.
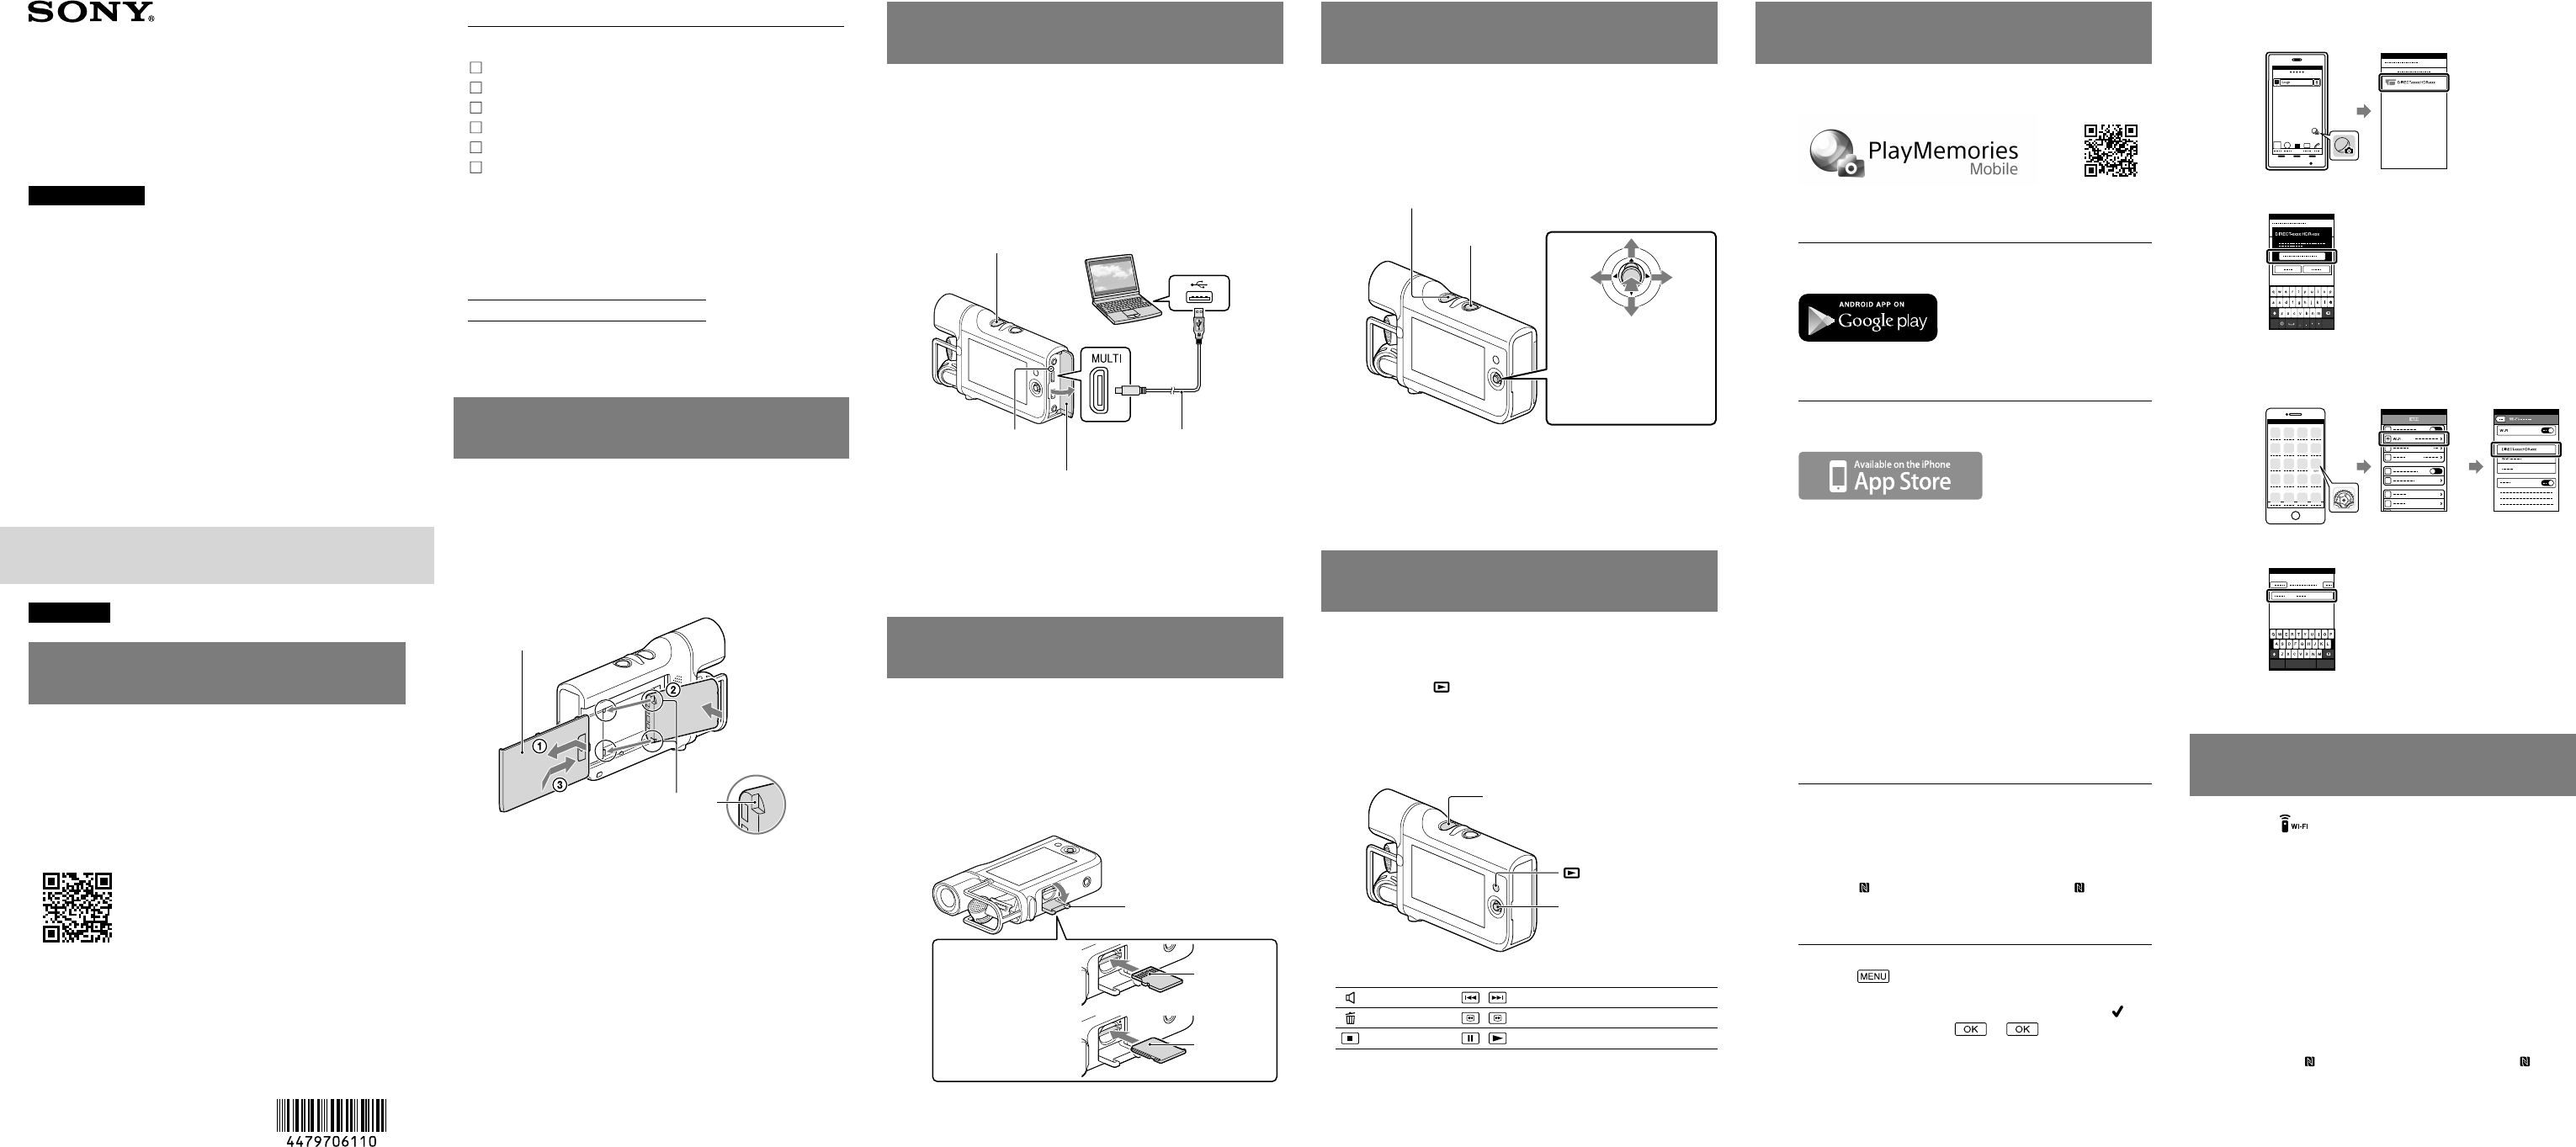
2
Select a movie on the camcorder that you want
to transfer, and then transfer it by connecting to
your smartphone.
When connecting to an Android device compatible
with NFC.
Play back a movie on the camcorder that you want to
transfer to your smartphone.
Start the [Setting] menu and select [Other settings]
on your smartphone, and confirm that [NFC] is
enabled.
Touch (N mark) on the camcorder with (N mark)
on your smartphone.
When connecting without using NFC.
Enter the playback mode on the camcorder, and
select
[Edit/Copy]
[Send to Smartphone]
[Select on This Device].
Select the image you want to transfer, and add
mark, and then select
.
The SSID and the password are displayed, and the
camcorder is ready for connection from your smartphone.
On your smartphone, select the SSID that is displayed
on the camcorder, and then enter the password.
English
Read this first
Before operating the unit, please read this manual
thoroughly, and retain it for future reference.
Learning more about the camcorder
(Music Video Recorder User Guide)
The Music Video Recorder User Guide is an online manual.
Refer to it for in-depth instructions on the many functions
of the camcorder.
Access the Sony support page.
http://www.sony.net/SonyInfo/Support/
Select your country or region.
Search for the model name of the
camcorder within the support page.
Check the model name on the bottom of
the camcorder.
Supplied items
The numbers in ( ) are the supplied quantity.
Camcorder (1)
USB cable (Micro USB cable) (1)
Rechargeable battery pack NP-BX1 (1)
Lens cap (1)
Cap string (1)
“Operating Guide” (This manual) (1)
Owner’s Record
The model and serial numbers are located on the bottom.
Record the serial number in the space provided below. Refer
to these numbers whenever you call upon your Sony dealer
regarding the camcorder.
Model No. HDR-
SerialNo.
In some models, the nameplate showing trademarks,
certification marks, and other information is located beside
the battery holder.
Installing the battery pack
1
Remove the battery cover.
2
Install the battery pack in the direction
illustrated.
3
Attach the battery cover.
Battery cover
Indentations
Android device:
1 Start up PlayMemories Mobile, and then select the
SSID that is displayed on the camcorder.
2 Enter the password that is displayed on the
camcorder (first time only).
iPhone:
1 On your smartphone, select [Wi-Fi] in the settings
menu, and then select the SSID that is displayed on
the camcorder.
2 Enter the password that is displayed on the
camcorder (first time only).
3 Confirm that the SSID is selected.
4 Start up PlayMemories Mobile.
Using your smartphone as a remote
commander (Wi-Fi)
1
Select on the recording screen of the
camcorder.
The SSID and the password are displayed on the
camcorder, and the camcorder is ready for connection
from your smartphone.
2
On your smartphone, select the SSID that is
displayed on the camcorder, and then enter the
password.
Perform the same procedure as in step of
“Transferring movies to your smartphone (Wi-
Fi)”/“When connecting without using NFC.”
If you want to use NFC, enter the recording screen, and
then touch (N mark) on the camcorder with (N
mark) on your smartphone.
3
Operate your smartphone.
© 2013 Sony Corporation
Printed in China
HDR-MV1
Digital HD Video
Camera Recorder
Operating Guide


Find Your Products By Category
Please Login
