
0
Owner's of the Tascam MP3 Player DR-60mkII Portable Field Recorder for DLSR gave it a score of 0 out of 5. Here's how the scores stacked up:

TASCAM DR-60D
39
3 – Preparation
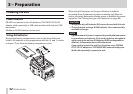
Preparing an SD card for use
In order to use an SD card in this unit, you must format it first.
CAUTION
•
When formatting a card, the unit should be operating on AC
power supplied through the PS-P515U adaptor (sold separately),
USB bus power supplied from a computer, or batteries with suffi-
cient remaining power.
•
Formatting a card erases all the data on it.
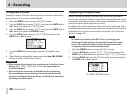
1. Confirm that an SD card is installed and turn the power ON.
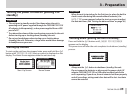
2. The following confirmation pop-up message appears when
a new card or a card formatted for use with another device is
installed in the unit.
3. Press the DATA dial to start formatting.
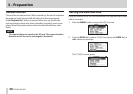
4. When formatting ends, the Home Screen opens. You can also
reformat the card in this unit at any time.
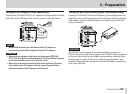
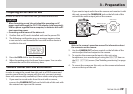
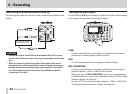
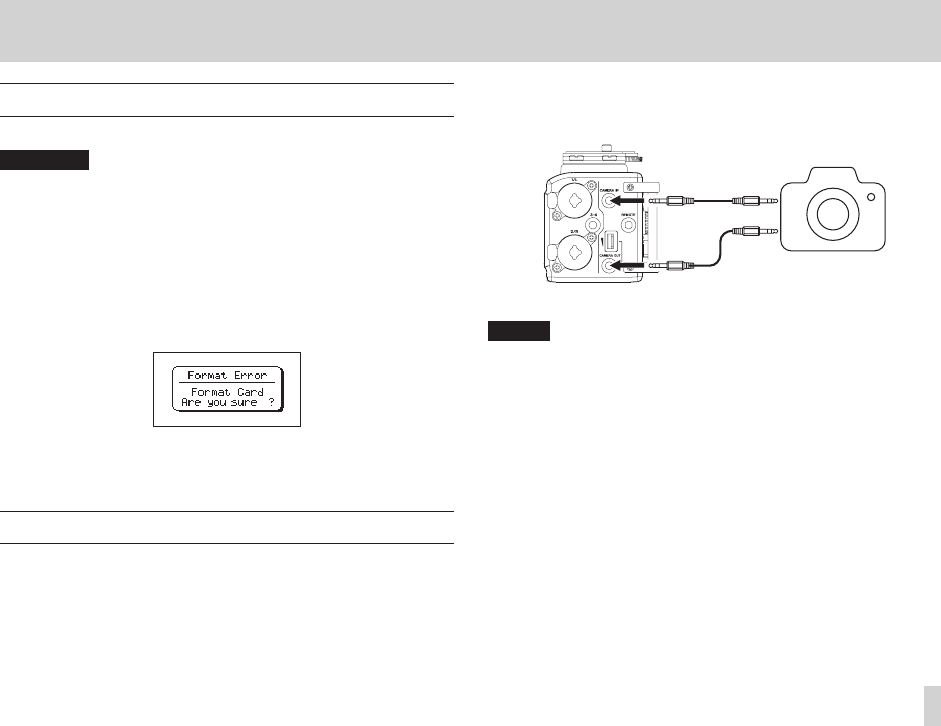
Camera connection and attachment
In order to output the sound from this unit to a DSLR camera and
monitor sound from the camera with this unit, you must connect
them with commercially-available φ3.5mm stereo mini plug cables.
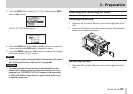
1. If you want to record audio from this unit with a camera,
connect the CAMERA OUT jack on the left side of this unit with
the external mic input on the camera.
If you want to input audio from the camera and monitor it with
this unit, connect the CAMERA IN jack on the left side of this
unit with the audio output jack on the camera.
External mic input jack
Audio output jack
DSLR camera
NOTE
Refer to the camera’s operation manual for information about
the connector on the camera.
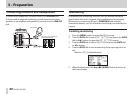
2. Use the CAMERA OUT volume control on the left side of the
unit to adjust the level output to the camera.
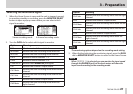
3. To monitor the camera audio input to this unit using
headphones, turn monitoring on using the
MONITOR
item on
the
REC SETTING
screen. (See“Enabling monitoring” on page
40.)
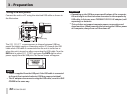
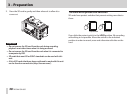
4. To mount the camera on this unit, use the camera attachment
screw on the top of the unit


Find Your Products By Category
Please Login
