
0
Owner's of the Tascam Clock Radio master clock generator gave it a score of 0 out of 5. Here's how the scores stacked up:


14
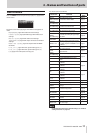
TASCAM CG-1800/CG-1000
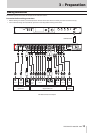
3 – Preparation
Turning the power on/off
This unit does not have a power switch.
When you connect the power cord to the AC IN connector,
operation will start.
To turn the power off, disconnect the power cord from the
unit. You can also use an external switch, for example, to stop
supplying power to the unit
Maximizing the clock generator accuracy
The OCXO (oven-controlled crystal oscillator) has extremely high
clock precision and can generate stable clock, but the following
precautions should be observed.
One characteristic of OCXOs is that they require a long time
to stabilize after power is supplied. This results because of the
initial fluctuation that is characteristic of crystal oscillators.
In order to achieve the best performance of an OCXO, we
recommend that you do not interrupt its power supply during
use.
Moreover, provide the unit with power for a long time so that
the internal oscillator is stable before calibrating it. This will
increase frequency precision. (See “Calibrating the internal oscil-
lator” on page 24.)
CAUTION
Never remove a USB flash drive when this unit is operating
(writing data to the drive, etc.). Doing so could cause data
not to be written correctly, cause written data to be lost or
otherwise impede the operation of the unit.
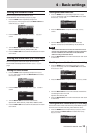
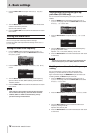
Setting the date and time
This unit records the date and time in log entries based on the
setting of its internal clock.
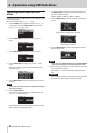
1. Press the MENU button repeatedly to open the
UTILITY
1
page, and turn the MULTI JOG dial to select the
CLOCK
ADJST
item.
2. Press the MULTI JOG dial to open the
CLOCK ADJST
screen.
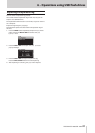
3. Press the MULTI JOG dial to enter setting mode and show
the cursor on the item to be changed.
4. Turn the MULTI JOG dial to change the value. Then press
the MULTI JOG dial to confirm it and move the cursor to the
next item.
5. After you change the year, month, day, hour and minute in
that order, the cursor will disappear, completing the setting
of the date and time.
NOTE
Press the EXIT/CANCEL button while making a setting to
cancel the change and return to the menu screen.
6. Press the EXIT/CANCEL button to return to the menu
screen.
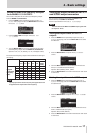
Adjusting the brightness
With this unit, you can adjust the brightness using a menu item
or by using the HOME/DISPLAY button and MULTI JOG dial.
Adjusting the brightness from the menu
You can only adjust the brightness of the indicators from the
menu.
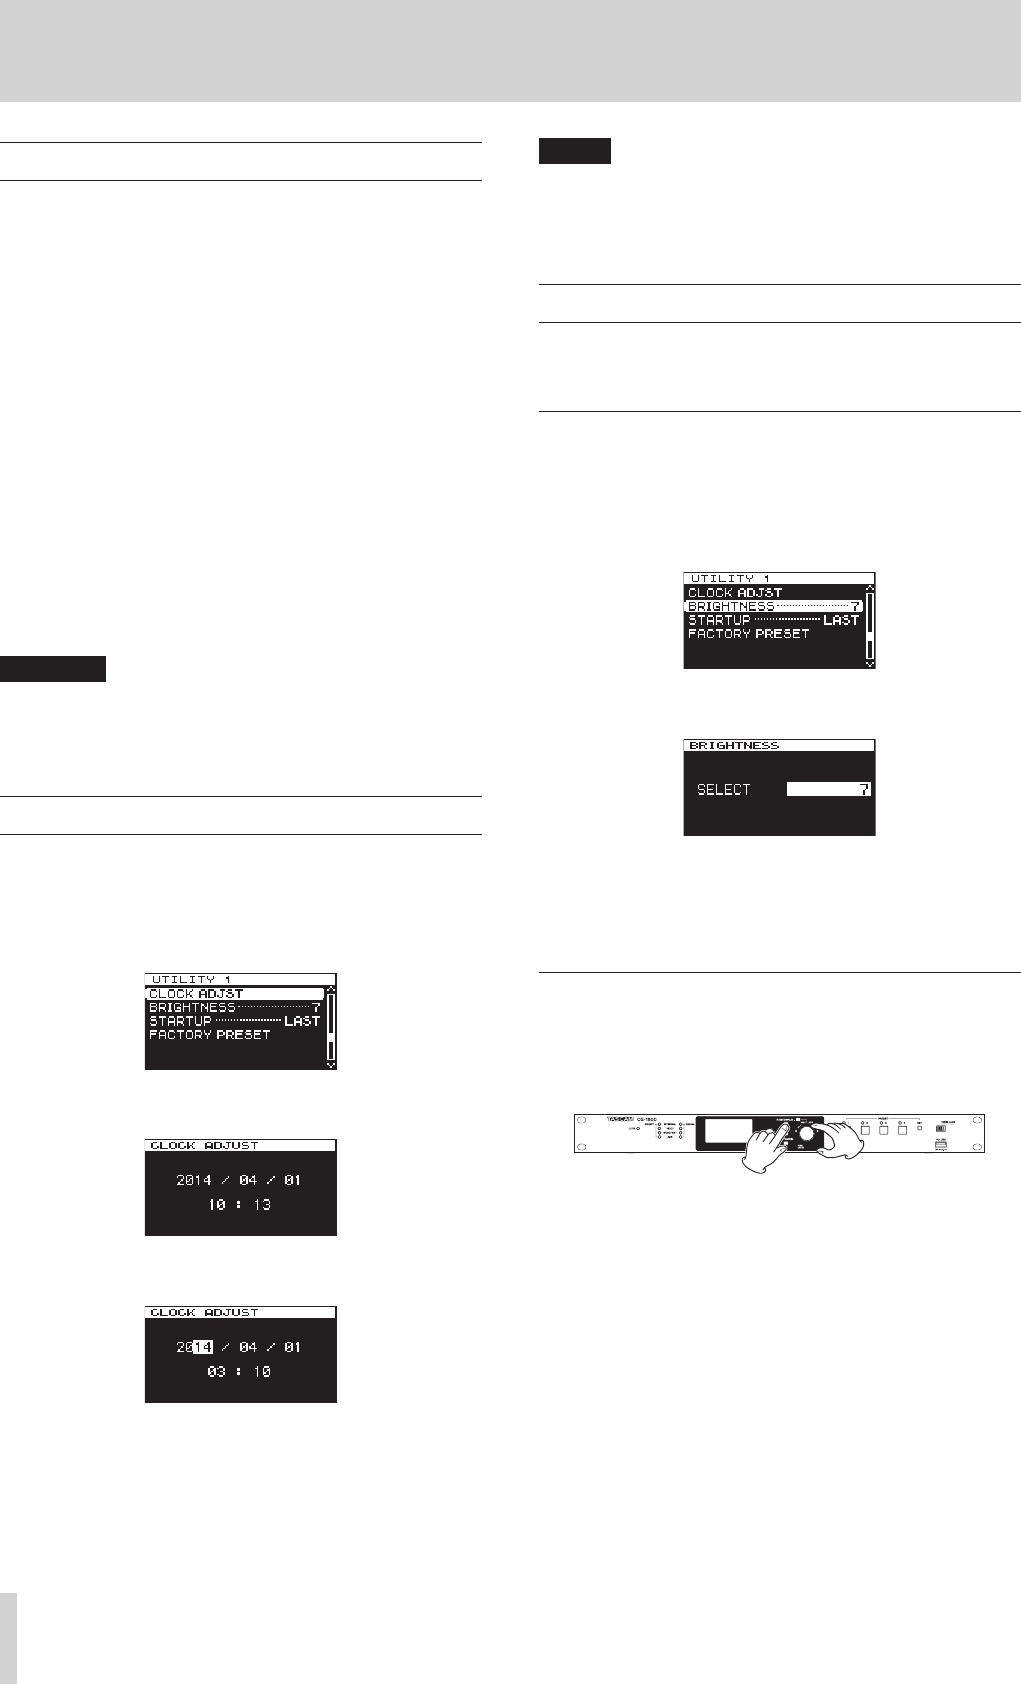
1. Press the MENU button repeatedly to open the
UTILITY
1
page, and turn the MULTI JOG dial to select the
BRIGHTNESS
item.
2. Press the MULTI JOG dial to open the
BRIGHTNESS
screen.
3. Turn the MULTI JOG dial to select the brightness value.
Options: 7 (default), 6, 5, 4, 3, 2, 1, 0
4. Press the MULTI JOG dial to confirm and return to the menu
screen.
Adjusting the brightness with the HOME/
DISPLAY button and MULTI JOG dial
While pressing and holding the HOME/DISPLAY button,
turn the MULTI JOG dial to adjust the display and indicator
brightness.


Find Your Products By Category
Please Login
