

0
Owner's of the Casio Electronic Keyboard Keyboard gave it a score of 0 out of 5. Here's how the scores stacked up:

Using the Song Sequencer
E-93
1.
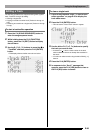
Display the event editor screen of the track that
includes the events you want to delete.
• See “To select a track for editing” (page E-91).
2.
While holding down the R-13 (FUNCTION)
button, press the C-17 (MENU) button to display
the event editor menu.
3.
Use the R-17 (t, y) buttons to move the 0 to
“Delete” and then press the R-16 (ENTER)
button.
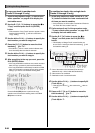
• This displays the “Delete” screen.
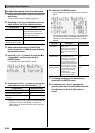
4.
Use the dial or R-14 (–, +) buttons to change the
setting in the thick brackets (%) to “All”, and
then press the R-16 (ENTER) button.
5.
In response to the “Sure?” message that
appears, press the R-14 (YES) button to delete
or the R-14 (NO) button to cancel.
1.
Display the event editor screen of the track that
includes the events you want to delete.
• See “To select a track for editing” (page E-91).
2.
If required, you can perform a song playback
operation at this time to check the range you
want to select for deletion.
• See “To play back a song from the event editor screen
(Quick Play)” (page E-92).
3.
While holding down the R-13 (FUNCTION)
button, press the C-17 (MENU) button to display
the event editor menu.
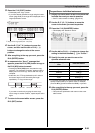
4.
Use the R-17 (t, y) buttons to move the 0 to
“Delete” and then press the R-16 (ENTER)
button.
• This displays the “Delete” screen.
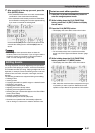
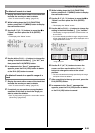
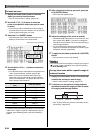
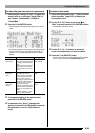
5.
Use the dial or R-14 (–, +) buttons to change the
setting in the thick brackets (%) to “Locator”.
• This displays a range specification screen like the one
shown below.
• If you have already specified a range using the locator
screen (page E-80), that range will be displayed on the
range specification screen.
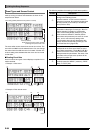
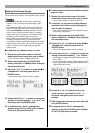
6.
Use the R-17 (u, i) buttons to move the
cursor, and then use the dial or R-14 (–, +)
buttons to change the value at the cursor
position.
• The event located at the timing specified by the range
end point will not be deleted.
7.
After everything is the way you want, press the
R-16 (ENTER) button.
8.
In response to the “Sure?” message that
appears, press the R-14 (YES) button to delete
or the R-14 (NO) button to cancel.
To delete all events in a track
To delete all events in a specific range of a
track
Range start point
Range end point


Find Your Products By Category
Please Login
