
0
Owner's of the Shure Microphone Wireless System gave it a score of 0 out of 5. Here's how the scores stacked up:
12
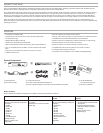
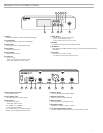
Creating Audio Channels
A wireless audio channel is formed when a receiver and transmitter are tuned to the same frequency. To ease setup, frequencies available to the QLX-D system are
organized into groups and channels. Each group contains a number of channels, and each channel is assigned to a specific preset frequency.
The QLX-D system provides 3 methods for tuning the receiver and transmitter to the same frequency:
• Scan and IR Sync: The receiver scans the RF spectrum for the best available frequency and an IR sync automatically tunes the transmitter to the receiver frequency
• Manual Group and Channel Assignment: Manually setting the receiver and transmitter to the same group and channel number forms an audio channel
• Manual Frequency Assignment: Manually setting the receiver and transmitter to the same frequency rather than using groups and channels forms an audio channel
Important: Before you begin a scan or frequency assignment:
• Turn off: All transmitters for system you are setting up to prevent interference with frequency scans.
• Turn on: The following potential sources of interference including other wireless systems, computers, CD players, large LED panels, and effects processors to prevent
selection of occupied frequencies.
Scan and IR Sync
The simplest way to create an audio channel is to use the scan function to find the best available receiver channel, and then use the IR sync feature to automatically tune
the transmitter to the receiver channel.
channel
I
I
I
I
I
I
I
I
I
I
I
I
I
I
I
I
I
I
I
I
I
I
I
I
I
I
I
I
I
I
I
I
I
I
I
I
I
I
I
I
I
I
I
I
I
I
I
I
I
I
I
I
I
I
scan
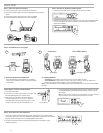
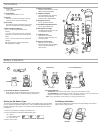
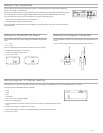
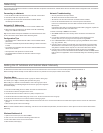
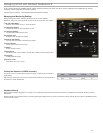
Step 2: IR Sync for Automatic Transmitter Set Up
Performing an IR Sync automatically tunes the transmitter to match the receiver frequency, forming a wireless audio channel.
1. Turn on the transmitter.
2. Press the sync button on the receiver. The red ir LED will blink indicating that sync mode is active.
3. Align the IR sync windows of the transmitter and receiver at a distance of <15 cm (6 in.). When the transmitter and receiver
are aligned, the red ir LED remains on and the sync will automatically occur.
4. sync good appears on the display when IR sync is complete. The blue rf LED will illuminate indicating that the transmitter
is within range of the receiver.
Note: If the IR sync fails, repeat the IR sync procedure, carefully maintaining alignment between the IR windows of the transmitter
and receiver.
< 15 cm (6 in.)
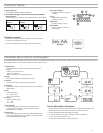
Manual Group and Channel Assignment
An audio channel can be manually created by simply setting the receiver and transmitter to the same group number and channel number. For example, a receiver set to
Group 2, Channel 3 and a transmitter set to Group 2, Channel 3 would form an audio channel.
Use manual group and channel configuration to assign specific groups and channels to receivers and transmitters as an alternative method to automatically creating
channels with IR sync.
Use the following steps to set the group and channel in the receiver and transmitter:
1. Navigate to the group setting.
2. Use the arrow buttons to scroll through the groups.
3. Press enter to select a group.
4. Next, use the arrow buttons to select a channel.
5. Press
enter to save.
group
I
I
I
I
I
I
I
I
I
I
I
I
I
I
I
I
I
I
I
I
I
I
I
I
I
I
I
I
I
I
I
I
I
I
I
I
I
I
I
I
I
I
I
I
I
I
I
I
I
I
I
I
I
I
I
I
I
I
I
I
I
I
I
I
I
I
I
I
I
I
I
I
I
I
I
I
I
I
channel
I
I
I
I
I
I
I
I
I
I
I
I
I
I
I
I
I
I
I
I
I
I
I
I
I
I
I
I
I
I
I
I
I
I
I
I
I
I
I
I
I
I
I
I
I
I
I
I
I
I
I
I
I
I
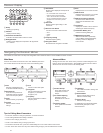
Manual Frequency Selection
Manual frequency selection can be used instead of groups and channels to set the transmitter and receiver to a specific frequency. For example, an audio channel can be
created by setting the receiver and transmitter to same frequency.
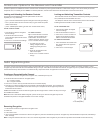
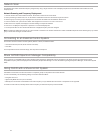
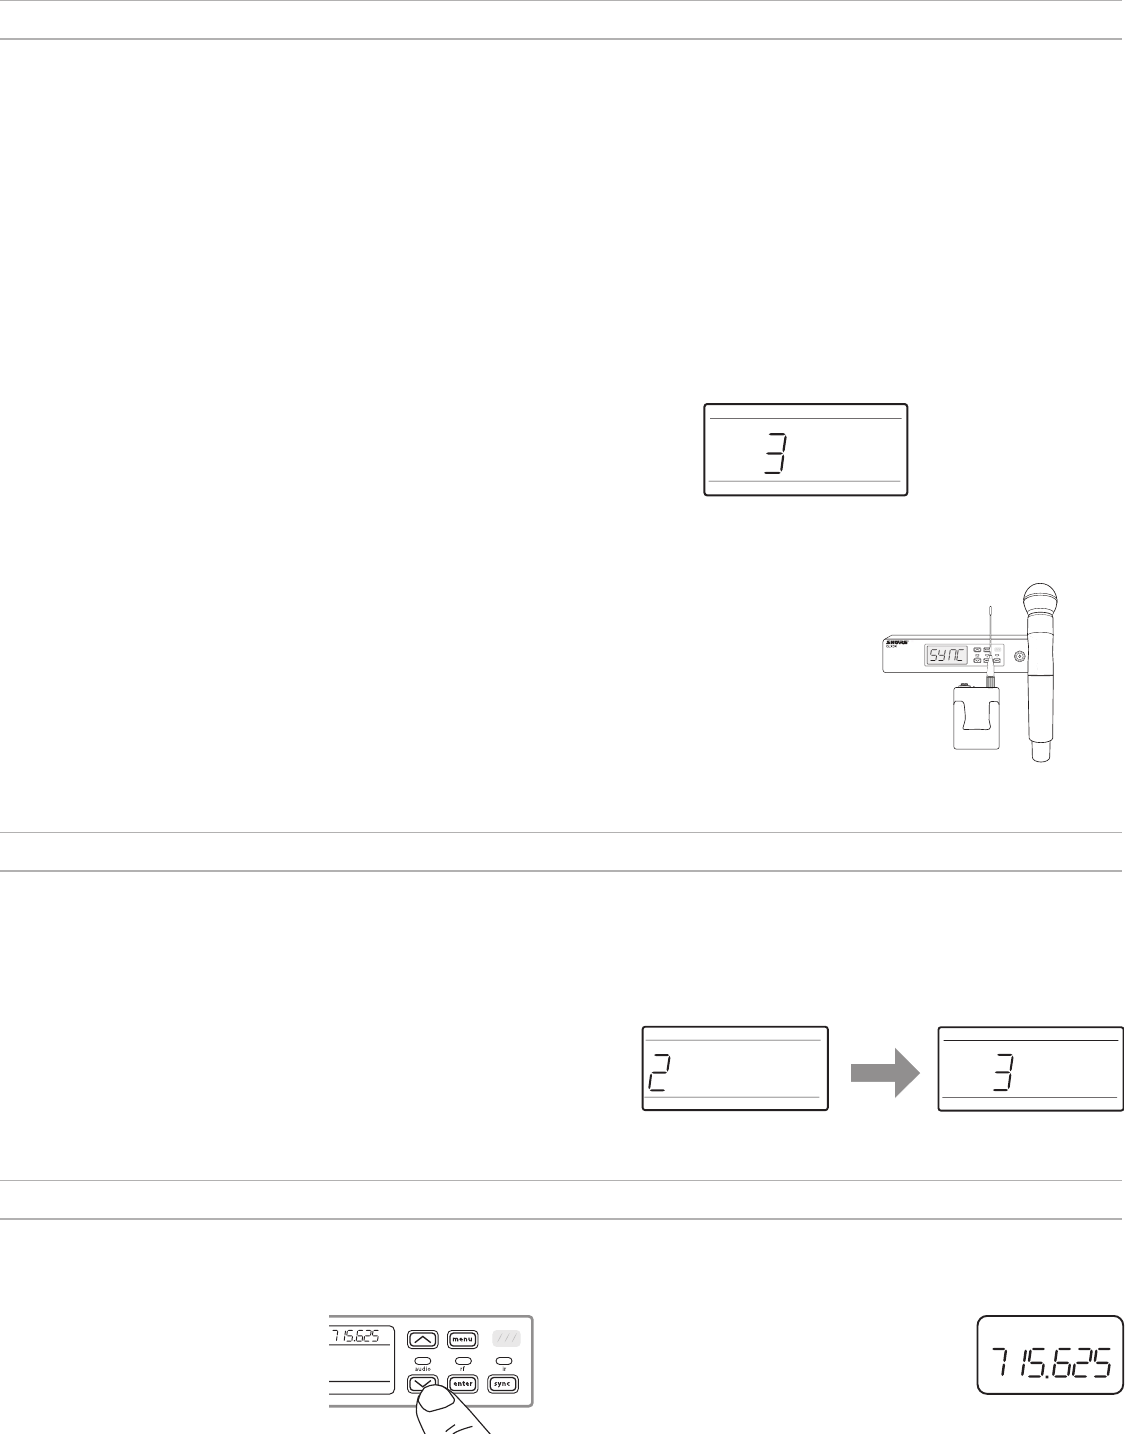
Setting the Receiver Frequency
1. Press menu to navigate to the frequency
setting option.
2. Use the arrow buttons to adjust the
frequency. Press and hold for faster scrolling.
3. Press enter to save.
MHz
Setting the Transmitter Frequency
1. Press menu to navigate to the frequency setting
option.
2. Use the arrow buttons to adjust the frequency. Press
and hold for faster scrolling.
3. Press enter to save.
MHz
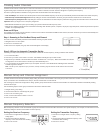
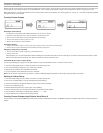
Step 1: Scanning to Find the Best Group and Channel
The Scan function automatically selects the best available receiver group and channel.
1. Navigate to the Scan menu option.
2. Press enter to start the scan.
3. When the scan is complete, the group and channel will appear on the display.


Find Your Products By Category
Please Login
