
0
Owner's of the Shure Microphone Wireless System gave it a score of 0 out of 5. Here's how the scores stacked up:

16
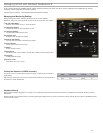
Custom Groups
Specific channels and frequencies can be selected and placed into custom groups. Custom groups are commonly used to assign networked receivers to a specific range
of frequencies or to pre-configure receivers for rental applications. Once a custom group has been created, it can be loaded to the receiver using the
group menu.
When network scan is used to assign frequencies from a receiver with a custom group selected, all of custom groups (U1, U2, U3, etc...) from that receiver will be loaded
to all other receivers on the network.
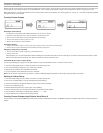
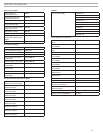
Creating Custom Groups
TV MHz
group channel
I
I
I
I
I
I
I
I
I
I
I
I
I
I
I
TV MHz
group channel
I
I
I
I
I
I
I
I
I
I
I
I
I
I
I
I
I
I
I
I
I
I
I
I
I
I
I
I
I
I
I
I
I
I
I
MHz
group channel
I
I
I
I
I
I
I
I
I
I
I
I
I
I
I
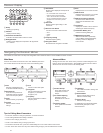
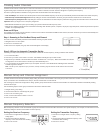
Selecting A Custom Group
The receiver has 6 custom groups available named U1, U2, U3, U4, U5, and U6.
a. Press menu while holding the enter button to access the Custom Group screen.
b. Press enter to enable editing of a group (indicated by the group flashing).
c. User the arrow buttons to select a group (U1 to U6).
d. Press
enter to advance to channel selection.
Selecting a Channel
a. Use the arrow buttons to select a channel (1-60). Each group can contain up to 60 channels (frequencies).
b. Press enter to save the selected channel and advance to frequency assignment.
Assigning a Frequency to a Channel
a. Use the arrow buttons to assign a frequency to the selected channel.
b. Press enter to save.
After pressing enter, the channel will flash to allow for adding more channels and frequencies to the custom group. To add more channels and frequencies, repeat
steps 2 and 3. When finished, press the menu button several times to return to the main menu.
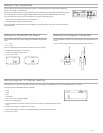
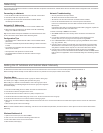
Transmitter IR Sync from a Custom Group
To ensure accurate display of group and channel information, IR sync the transmitter from the Custom Group menu screen:
1. Press menu while holding the enter button to access the Custom Group screen.
2. Turn on the transmitter and press the sync button on the receiver.
3. Align the IR sync windows of the transmitter and receiver.
4. sync good appears on the display when IR sync is complete.
Note: If the IR sync fails, repeat the IR sync procedure, carefully maintaining alignment between the IR windows of the transmitter and receiver.
Deleting a Custom Group
1. Press menu while holding the enter button to access the Custom Group screen.
2. Press enter to enable editing of a group (indicated by the group flashing).
3. User the arrow buttons to navigate to display the group number and the words DEL.
4. Press enter to delete the group.
To delete individual channels from a custom group, do the following:
1. Enter the custom groups menu and select the frequency for the channel to be deleted.
2. Press and hold an arrow button until the frequency displays ---.--- MHz.
3. Press and hold the menu button to confirm change and exit.
Creating Custom Groups using Wireless Work Bench 6
Custom groups can be created in WWB6 by accessing the Frequency Coordination tab. Refer to the WWB6 help system for detailed instructions for configuring Custom
Groups.


Find Your Products By Category
Please Login
