

0
Owner's of the Casio Electronic Keyboard Keyboard gave it a score of 0 out of 5. Here's how the scores stacked up:
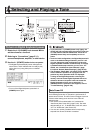
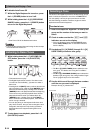
Selecting and Playing a Tone
E-18
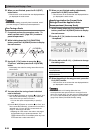
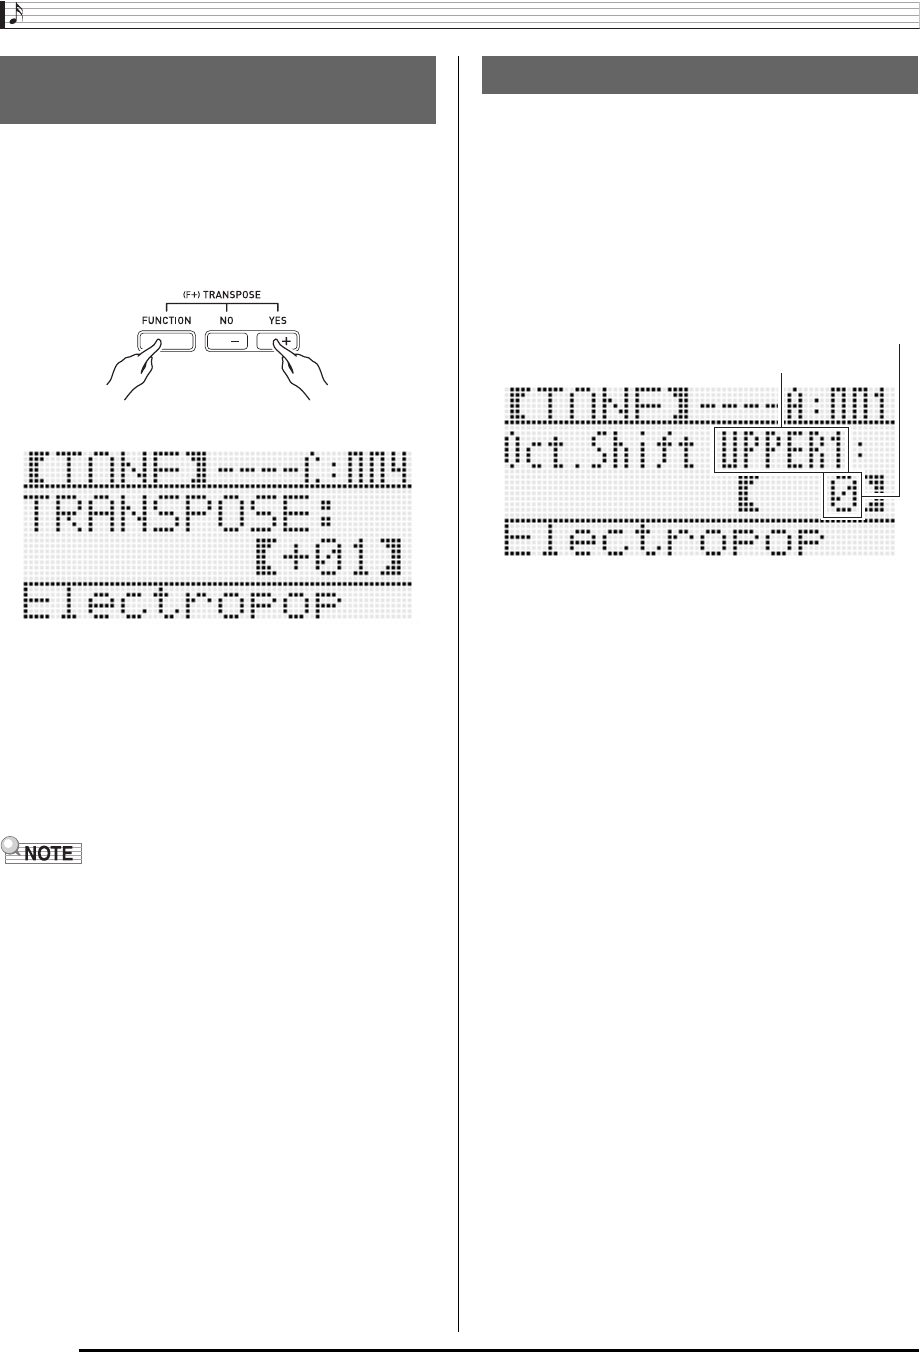
The transpose feature lets you raise or lower the overall
tuning of the keyboard in semitone steps. You can use this
feature to adjust keyboard tuning to a key that better matches
a vocalist, another musical instrument, etc.
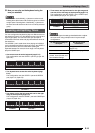
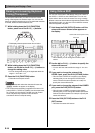
1.
While holding down the R-13 (FUNCTION)
button, press one of the R-14 (–, +) buttons.
• This displays the transpose screen shown below.
2.
While holding down the R-13 (FUNCTION)
button, use the dial or the R-14 (–, +) buttons to
change the setting value.
• You can change the tuning of the keyboard within the
range of –12 to 00 to +12.
3.
Press the R-13 (FUNCTION) button.
• This exits the transpose screen.
• Setting a transposed value other than 00 will cause the
B indicator to appear on the display.
• The current transpose setting is applied to the notes of all
parts (UPPER 1,
UPPER 2
,
LOWER
, Auto Accompaniment,
etc.) played on the keyboard. The MIDI out note number
when a keyboard key is pressed is also shifted in
accordance with the transpose setting.
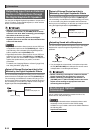
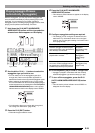
You can use octave shift to individually change the octave of
the UPPER 1, UPPER 2, and LOWER parts. You can use
octave shift to raise or lower the octave of a song, to assign
different octaves to the left side and right side keyboards while
the keyboard is split, or to play two notes in different octaves
while the keyboard is layered.
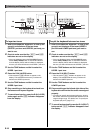
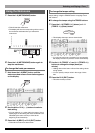
1.
Hold down the R-20 (OCTAVE) button until the
octave shift screen shown below appears on
the display.
• This indicates you can change the UPPER 1 part
octave.
2.
Use the dial or R-14 (–, +) buttons to specify the
octave shift amount.
• You can shift the octave within the range of –2 to 0 to
+2.
3.
If you want to change the octave of the
UPPER 2 part, press the R-20 (OCTAVE) button.
• This will cause “UPPER 2” to appear on the display,
indicating that you can change the UPPER 2 part
octave. Perform the same operation as in step 2 to
specify the octave shift amount.
4.
If you want to change the octave of the LOWER
part, press the R-20 (OCTAVE) button.
• This will cause “LOWER” to appear on the display,
indicating that you can change the LOWER part octave.
Perform the same operation as in step 2 to specify the
octave shift amount.
5.
Press the R-20 (OCTAVE) button or the R-15
(EXIT) button.
• This exits the octave shift screen.
Raising and Lowering Keyboard
Tuning (Transpose)
Using Octave Shift
Part name
Octave shift amount (Octave unit)


Find Your Products By Category
Please Login
