
0
Owner's of the Casio Electronic Keyboard Keyboard gave it a score of 0 out of 5. Here's how the scores stacked up:
Music Presets
E-64
4.
Specify the location of the new chord insert as a
number of beats after the current cursor
position.
• Except for the R-8 (7) button, pressing the R-4 ( • )
button after you press any one of the above buttons will
increase number of beats by 1.5.
• Pressing the R-10 (,) button after you press any one
of the above buttons will change the number of beats
by 2/3.
• The R-9 (8) and R-11 (.) buttons are disabled
during this step.
5.
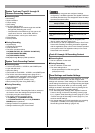
Press the R-16 (ENTER) button.
• This inserts the chord and causes the cursor to appear
at the “ROOT” position of the inserted chord data. The
initial default root setting is C.
6.
Use the dial or the R-14 (–, +) buttons to specify
the root.
7.
Use the R-17 (i) button to move the cursor to
“TYPE” position, and then use the dial or R-14
(–, +) buttons to configure the type setting.
• When the cursor is located at “ROOT” or “TYPE”, you
can use the chord keyboard to specify the chord root or
type.
8.
To apply the chord data, press the R-16
(ENTER) button.
• This causes the cursor to stop flashing.
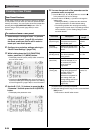
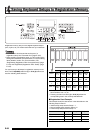
1.
Perform steps 1 through 4 of the procedure
under “Chord Progression Editing Flow” on
page E-62.
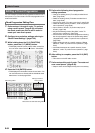
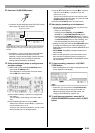
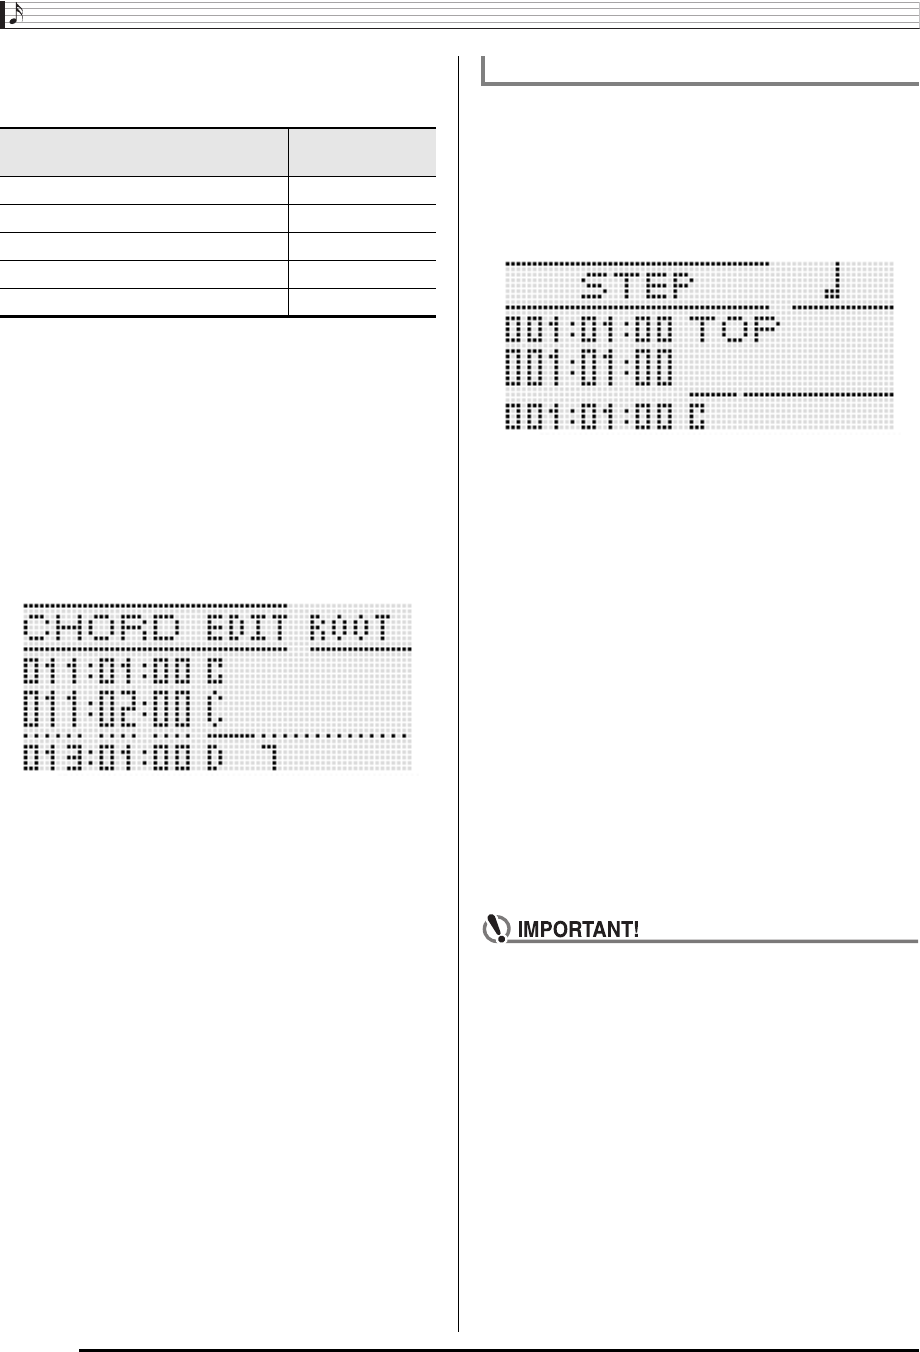
2.
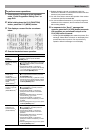
Press the C-14 (STEP) button.
• This will display a step screen like the one shown
below.
3.
Use the L-14 (dFF) and L-13 (sREW)
buttons to move the cursor to the location from
which you want to perform step input.
• The cursor will move in one-measure steps.
4.
Specify the length of the chord you want to
input.
• For information about how to do this, see the table in
step 4 under “To insert an event” (page E-94).
• The R-9 (8) button is disabled during this step. Also
note that you cannot specify a dotted 16th note.
5.
Press the keyboard keys that correspond to the
chord you want to input.
• Press keyboard keys in accordance with the current
chord fingering mode. For details, see “Selecting a
Chord Fingering Mode” (page E-26).
• The chord is input as soon as you press the keyboard
key, and the cursor will move by the length you
specified in step 4 to the next measure:beat:tick. From
there you can input the next chord, if you want.
• You cannot input more than 999 measures here.
6.
Repeat steps 4 and 5 to input the chords you
want.
• If you want to input a series of chords of the same
length, skip step 4 and perform step 5 only.
7.
When you are finished with step input, press
the R-15 (EXIT) button twice.
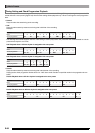
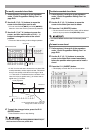
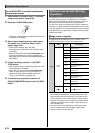
To specify this number of beats
after the current cursor position:
Press this button:
4 beats R-1 (5)
2 beats R-2 (1)
1 beat R-3 (2)
1/2 beat R-7 (6)
1/4 beat R-8 (7)
To perform step input of chords


Find Your Products By Category
Please Login
