
0
Owner's of the Casio Electronic Keyboard Keyboard gave it a score of 0 out of 5. Here's how the scores stacked up:
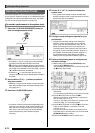
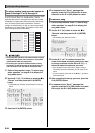
Using the Song Sequencer
E-80
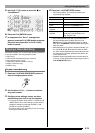
1.
Press the C-4 (SONG SEQUENCER) button to
enter the song sequencer mode.
2.
Use the dial or R-14 (–, +) buttons to select a
song area number.
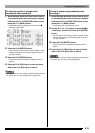
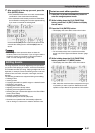
3.
Press the C-7 (MIXER) button to display the
mixer screen.
4.
Use the R-17 (u, i) buttons to select the part
you want to play (A04 through A16, B01 through
B16).
• For example, to play only the melody that was recorded
using the UPPER 1 part and recorded into the system
track, select part A05. For details about the content of
each part, see “How Parts are Organized” (page E-36).
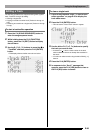
5.
Use the R-17 (t, y) buttons to move the thick
brackets (%) to “Part”.
6.
Press the R-14 (–, +) buttons at the same time.
• This causes the setting to change to “Sol” (Solo).
7.
Press the L-16 (START/STOP) button.
• This starts playback only of the part you selected in
step 4.
• Playback stops automatically when it reaches the end
of a song. To stop playback part way through, press the
L-16 (START/STOP) button.
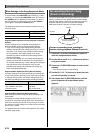
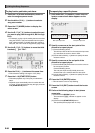
1.
Hold down the L-12 (REPEAT) button until the
locator screen shown below appears on the
display.
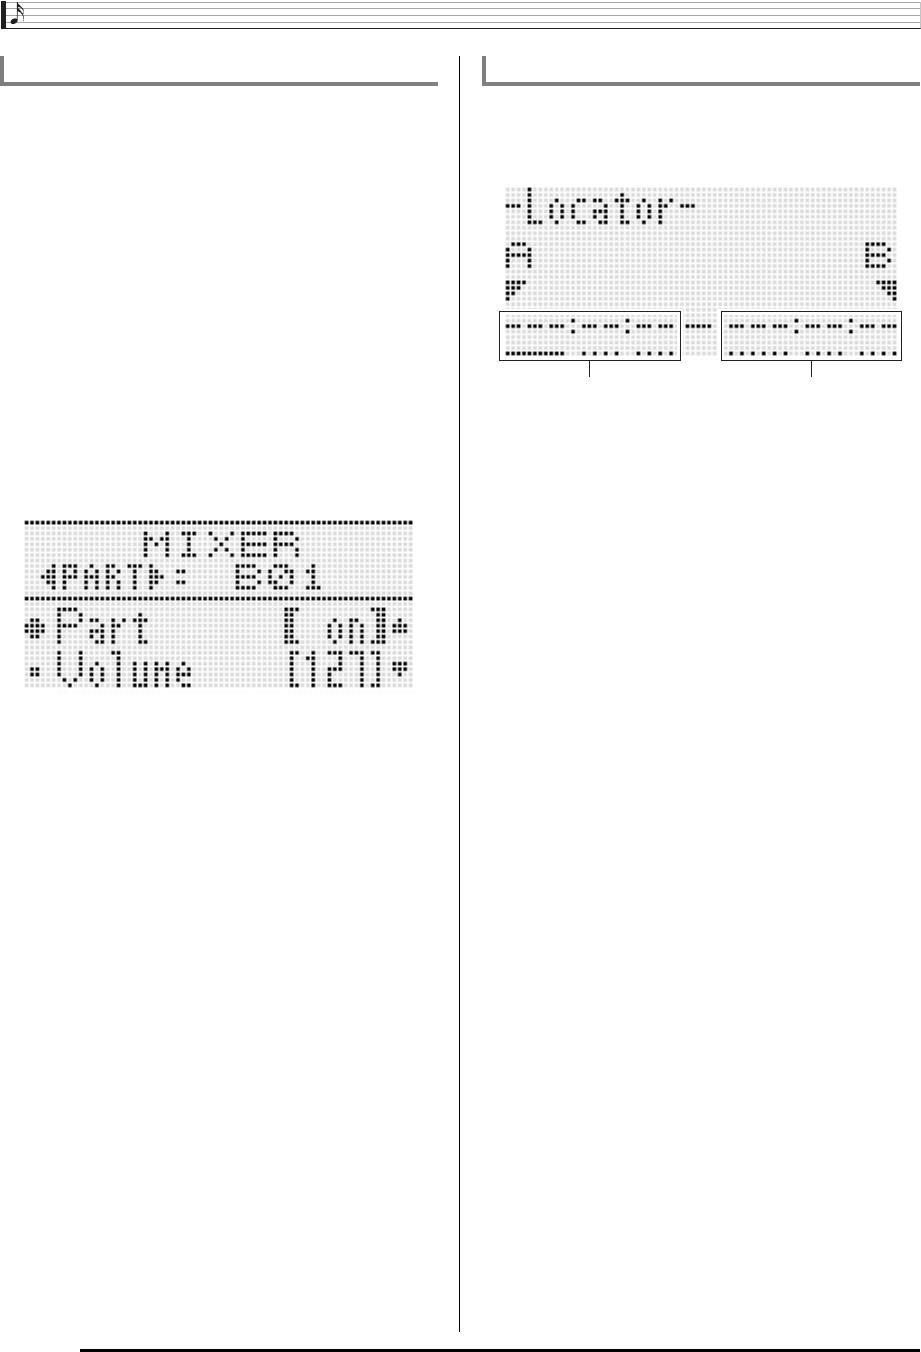
2.
Specify a measure as the start point of the
phrase to be repeat played.
3.
Specify a measure as the end point of the
phrase to be repeat played.
4.
Press the R-16 (ENTER) button.
• This causes the cursor to stop flashing.
5.
Press the R-15 (EXIT) button to exit the locator
screen.
6.
Perform the following steps to start phrase
repeat play.
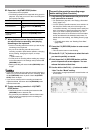
To play back a particular part alone To repeat play a specific phrase
(1)Press the R-14 (+) button.
This will input “001:01:00” into the start point input area
(A), and cause the cursor to start to flash.
(2)Use the dial or R-14 (–, +) buttons to specify the start
measure number.
(1)Press the R-17 (i) three times to move the cursor to
the end point input area.
Press the R-14 (+) button.
The end point input area (B) initially shows the
measure that is one measure after the start point.
(2)Use the dial or R-14 (–, +) buttons to specify the end
measure number.
(1)Press the L-12 (REPEAT) button.
This causes the ? indicator to appear on the
display.
(2)Press the L-16 (START/STOP) button.
The specified phrase plays back in a loop.
Start point input area End point input area


Find Your Products By Category
Please Login
