
0
Owner's of the Tascam MP3 Player 2ch audio recorder ad/da converter gave it a score of 0 out of 5. Here's how the scores stacked up:

14
TASCAM DA-3000
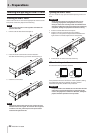
2 – Names and Functions of Parts
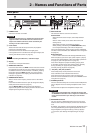
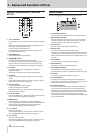
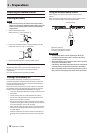
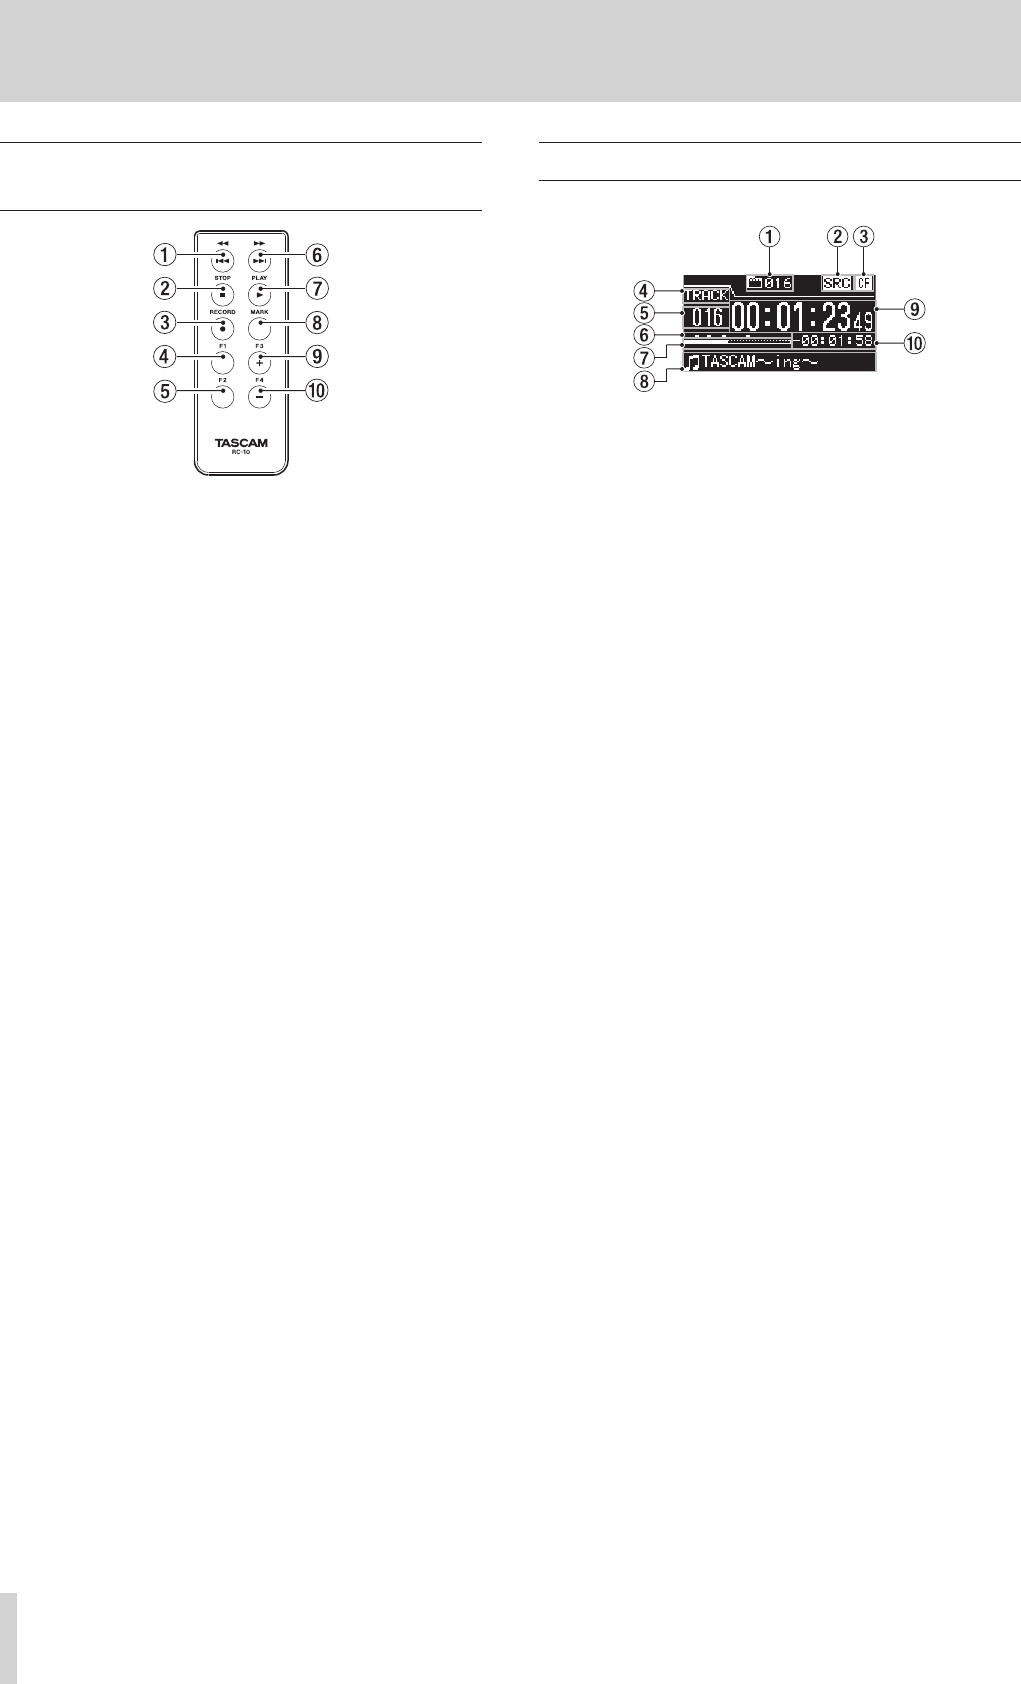
Wireless remote control (TASCAM
RC-10)
1 m/. button
During playback, press briefly to skip to the beginning of the
track.
When near the beginning of a track, press briefly to skip to
the beginning of the previous track.
Press and hold to search backward.
Press when the
BROWSE
screen is open to move up one
level in the folder structure.
2 STOP [8] button
Press to stop playback and recording.
3 RECORD [0] button
Press when stopped to start recording standby.
Press during recording to create a new higher-numbered
track and continue recording without interruption. (See
“Creating a higher numbered track manually” on page 28.)
4 F1 button
Press when stopped or during playback to switch to
playback standby.
Press when recording to switch to recording standby.
5 F2 button
When a menu screen is open, press to return to the Home
Screen.
Press when the Home Screen is open to change the display
mode. (See “Home Screen” on page 14.)
6 ,// button
Press briefly to skip to the next track.
Press and hold to search forward.
Press when the
BROWSE
screen is open to move down one
level in the folder structure.
7 PLAY [7] button
Press when stopped or in playback standby to start playback.
Press in recording standby to start recording.
8 MARK button
Press when stopped, recording, in playback standby or
during playback to manually add a mark. (See “Adding marks
manually during recording” on page 29.) (See “Adding
marks manually during playback” on page 40.)
9 F3 [+] button
Skip to the next mark.
Press when the
BROWSE
screen is open to move the cursor
up. (See “BROWSE screen navigation” on page 32.)
0 F4 [−] button
Skip to the previous mark.
Press when the
BROWSE
screen is open to move the cursor
down. (See “BROWSE screen navigation” on page 32.)
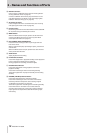
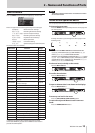
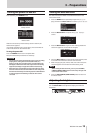
Home Screen
The main unit display shows the following information.
1 Total number of tracks
This shows the total number of tracks in the playback area.
2 SRC operation indicator
When the sampling rate converter is on, an “SRC” indicator
appears here. When SRC is off, nothing appears here. (See
“Using the sampling rate converter” on page 23.)
3 Current device
This icon shows the currently selected device.
4 Display mode
This is the current Home Screen display mode.
The unit has two display modes. The TRACK mode shows the
elapsed time and remaining time of the current file, and the
TOTAL mode shows the elapsed time and remaining time of
all tracks.
5 Track number
This is the number of the track that is playing.
6 Mark indicators
These are the locations of marks in the track.
7 Track playback position
This shows the current playback position as a bar. As
playback advances, the bar extends from the left to the right.
8 Track title
This is the file name of the track that is playing.
9 Track elapsed time
Depending on the display mode, this shows the elapsed
time (hours: minutes: seconds) of all the tracks in the current
playback area or of the currently playing track.
0 Track remaining time
This is the remaining time (hours: minutes: seconds) of the
current track or all the tracks in the current playback area.
Depending on the display mode, this shows the remaining
time (hours: minutes: seconds) of all the tracks in the current
playback area or of the currently playing track. During
recording, this shows the remaining available recording time
on the current media.


Find Your Products By Category
Please Login
