
0
Owner's of the Tascam MP3 Player DP-32SD 32-Track Digital Portastudio gave it a score of 0 out of 5. Here's how the scores stacked up:

TASCAM DP-32SD 17
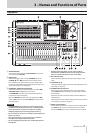
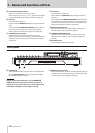
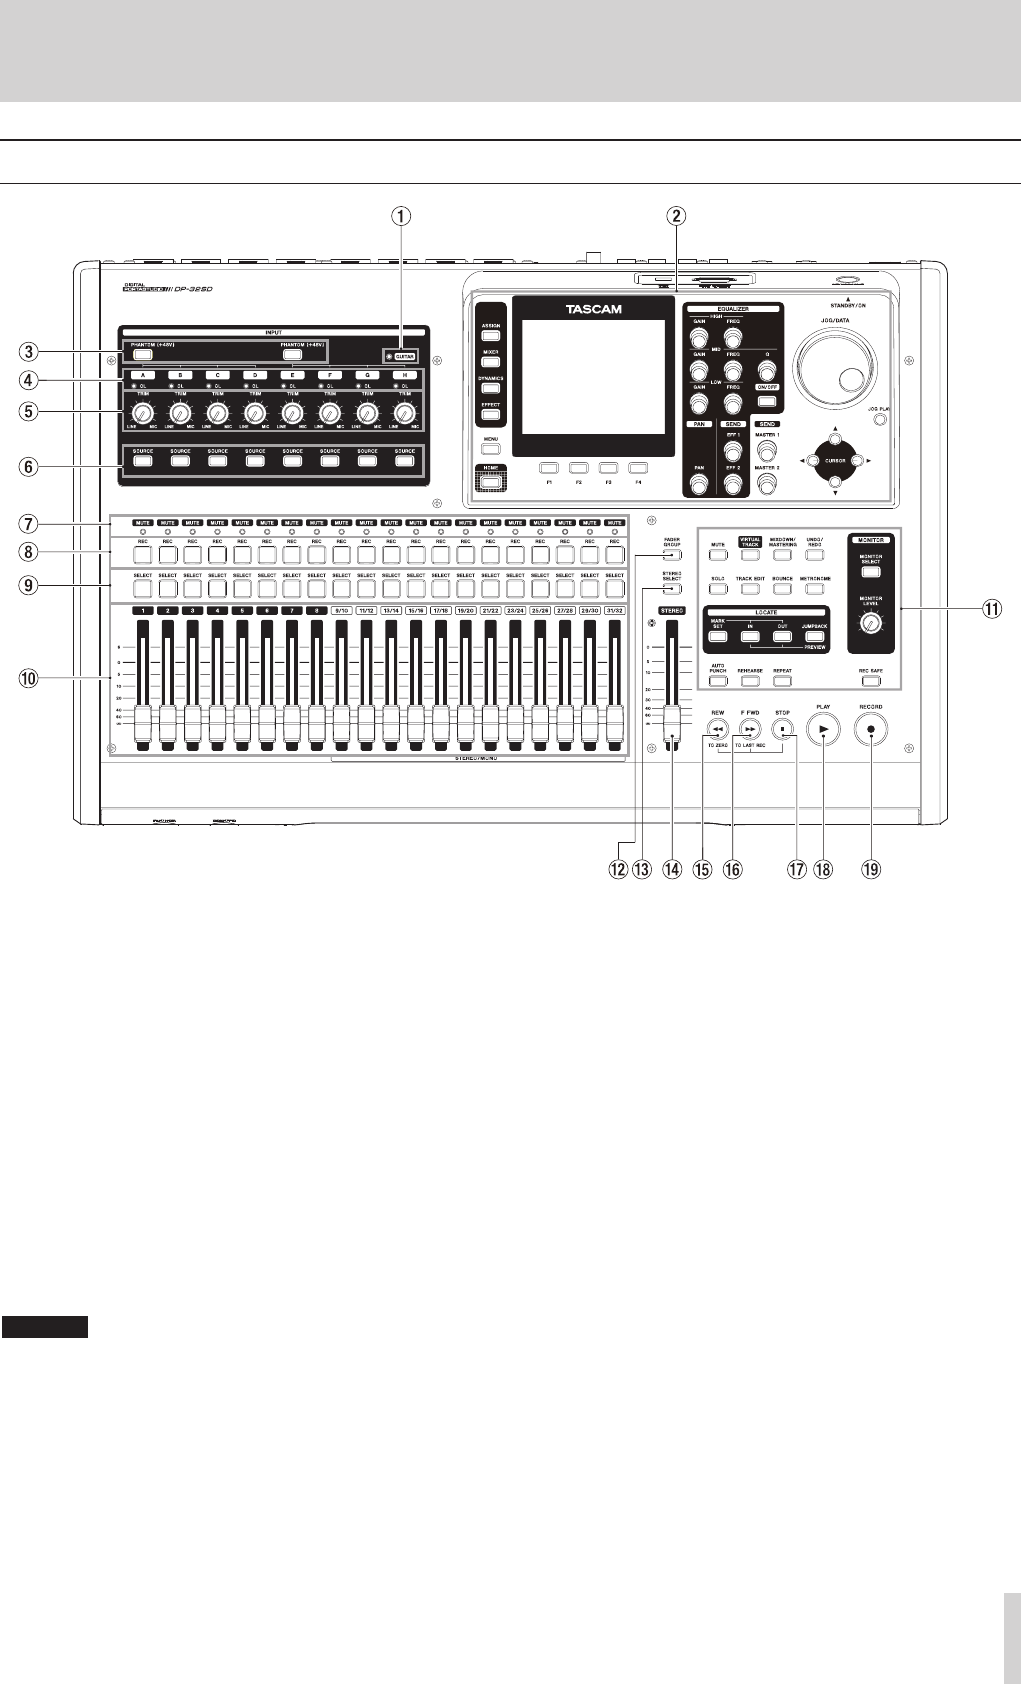
3 – Names and Functions of Parts
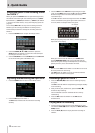
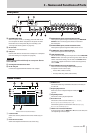
Top panel
1 GUITAR indicator
This indicator lights when the LINE-GUITAR switch on the
rear panel is set to GUITAR.
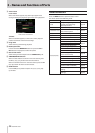
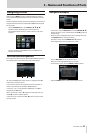
2 Display area
While viewing the screen, use the JOG/DATA dial or the
CURSOR (5/b/g/t) buttons to, for example, return
to the Home screen, open the
MENU
screen, assign input
signals to tracks and change parameters for each input and
track. (See “Display area” on page 18.)
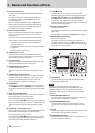
3 PHANTOM (+48V) buttons/indicators
Use these buttons to turn phantom power on/off for MIC/
LINE INPUTS A-D and E-H on the rear panel.
The PHANTOM indicators light when phantom power is
turned on for each set of inputs.
When the GUITAR indicator is lit, even if phantom (+48V)
power is ON (indicator lit) for E-H, INPUT H will not receive
phantom power.
CAUTION
•
Use the STEREO fader to lower the output volume of the
unit before turning phantom power on or off. Depending
on the microphone, a loud noise could occur, possibly
damaging equipment and harming people's hearing.
•
Do not connect or disconnect a microphone when phantom
power is turned on.
•
Turn phantom power on only when using a condenser
microphone that requires phantom power.
•
Do not supply phantom power to an unbalanced dynamic
microphone.
•
Supplying phantom power to some types of ribbon
microphones could break them. Do not supply phantom
power to a ribbon microphone if you are in doubt.
4 OL indicators (A-H)
These indicators light when the input source signal is too
loud.
5 TRIM knobs (A-H)
Use these knobs to adjust input levels. (See “Making the first
recording” on page 38.)
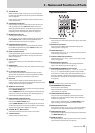
6 SOURCE buttons/indicators
When you press one of these buttons, the corresponding
input (INPUT A to H) is selected as the input source (and its
button lights).
Operation of mixer controls and other functions affect the
selected input.
These buttons are also used to assign input sources to tracks.
(See “Assigning inputs” on page 33.)
7 MUTE (solo) indicators
These indicators light when a track is muted or soloed. When
the SOLO button is not lit, it indicates the track is muted.
When the SOLO button is lit, it indicates the track is soloed.


Find Your Products By Category
Please Login
