
0
Owner's of the Tascam MP3 Player DP-32SD 32-Track Digital Portastudio gave it a score of 0 out of 5. Here's how the scores stacked up:

36 TASCAM DP-32SD
6 - Basic Recording
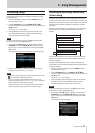
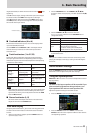
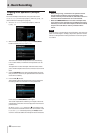
3. Press the EQUALIZER ON/OFF button to the right of the
LOW FREQ knob to turn the equalizer on/off.
The equalizer parameters are as follows.
GAIN FREQ
HIGH
Setting range: ±12
dB
(Default: 0 dB)
Setting range: 1.7 kHz to
18 kHz
(Default: 10 kHz)
MID
Setting range: ±12
dB
(Default: 0 dB)
Setting range: 32 Hz to
18 kHz
(Default: 1.0 kHz)
LOW
Setting range: ±12
dB
(Default: 0 dB)
Setting range: 32 Hz to
1.6 kHz
(Default: 100 Hz)
Use track SELECT buttons to select desired tracks.
Use INPUT SOURCE buttons to select desired inputs.
Use HIGH, MID and LOW GAIN knobs to adjust the gain of
each band.
Use the HIGH, MID and LOW FREQ knobs to adjust the
center frequency of each band.
Use the MID Q knob to set the resonance (width) of the MID
FREQ band.
Setting range:
0.25
to
16
(Default:
0.5
)
NOTE
•
The "Q" value is the center frequency of the equalizer divided by
the bandwidth. A high Q value reduces the range of the cut or
boost applied to the frequencies. Depending on the equalizer
setting, the graph at the top of the screen changes.
•
If you press the F1 (
EQ FLAT
) button, all the settings shown on
the open Mixer screen will be restored to their default values.
3. After making the settings, press the HOME button to return
to the Home screen.
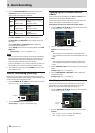
DIGITAL TRIM setting (track only)
Depending on the playback sound, EQ boosting could cause
distortion (digital clipping). If this happens, use the DIGITAL TRIM
to lower the playback level before the EQ.
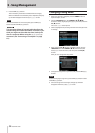
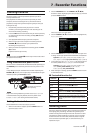
1. Use the CURSOR (5/b/g/t) buttons to move the cursor
to the
DIGITAL TRIM
display area.
Digital trim
2. Turn the JOG/DATA dial to set the value.
Setting range:
-42dB
to
+6dB
(Default:
0dB
)
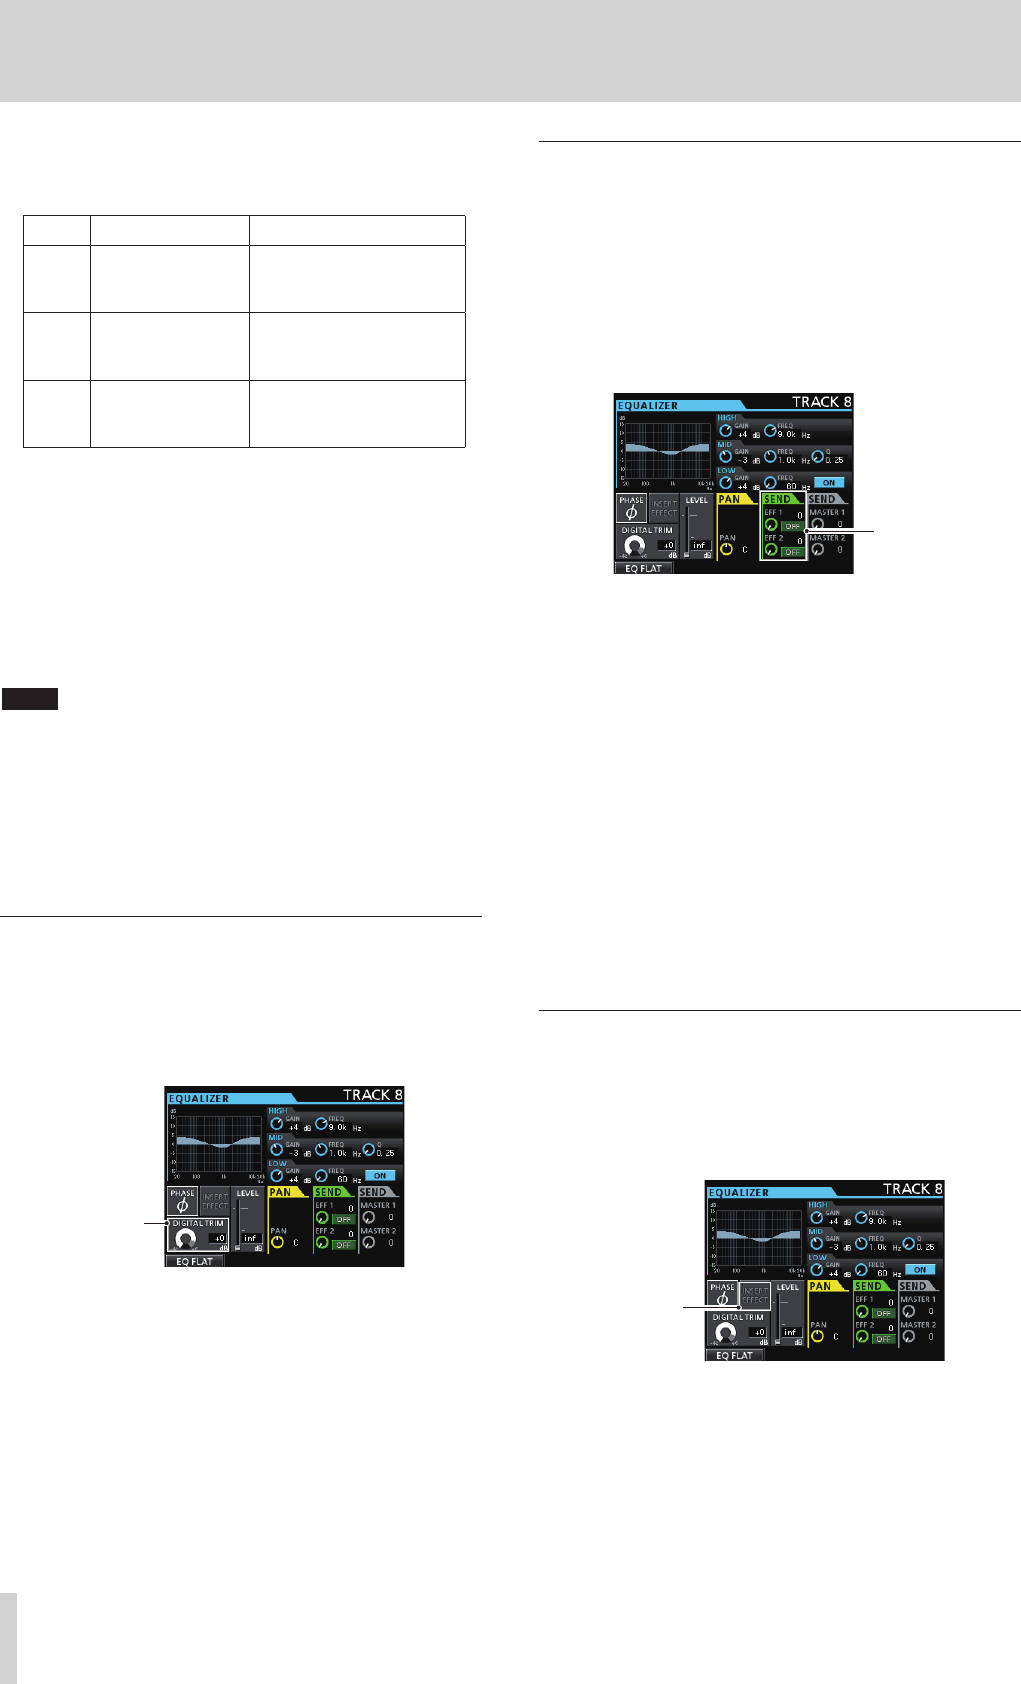
Sending signals to internal/external
effects
This unit has two external effect sends (EFF 1 and EFF 2) and a
send for the internal effects (INSERT EFFECT).
You can adjust send levels for each track. For details about the
built-in send effects, see “Send effects” on page 53.
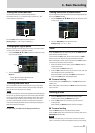
Follow these procedures to enable use of these effects.
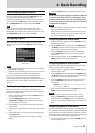
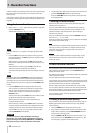
1. Use the CURSOR (5/b/g/t) buttons to move the cursor
to the
SEND EFF 1/EFF 2
area.
Effec
t sends
2. Turn the JOG/DATA dial to enable the effect.
Options:
OFF
(default),
PRE
,
POST
PRE
This sends the track pre-fader signal to the effect send
bus. The effect send signal level is not affected by the track
fader.
POST
This sends the track post-fader signal to the effect send
bus. The effect send signal level is affected by the track
fader.
3. Use the SEND EFF 1/EFF 2 knobs to adjust the external send
levels.
Setting range:
0
to
127
(Default:
0
)
4. Use the SEND MASTER 1/MASTER 2 knobs to adjust the
internal send levels.
Setting range:
0
to
127
(Default:
0
)
Enabling insert effects
This unit has dynamic and guitar effects that can be used as
insert effects. For details about these effects, see “Dynamic
effects” on page 52 and “Guitar effects” on page 52.
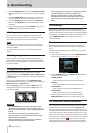
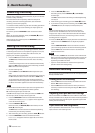
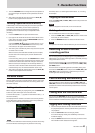
1. Use the CURSOR (5/b/g/t) buttons to move the cursor
to the
INSERT EFFECT
area.
Inser
t effect
indicato
r
2. Turn the JOG/DATA dial to enable/disable the insert effect.
Options
OFF:
INSERT EFFECT
indicator unlit (default)
ON:
INSERT EFFECT
indicator lit


Find Your Products By Category
Please Login
