
0
Owner's of the Tascam VCR DR-70D 4-Channel Audio Recorder for DSLR Cameras gave it a score of 0 out of 5. Here's how the scores stacked up:

TASCAM DR-70D
13
3 – Preparation
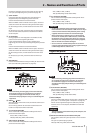
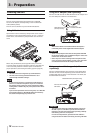
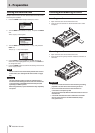
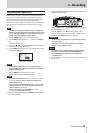
Using USB bus power
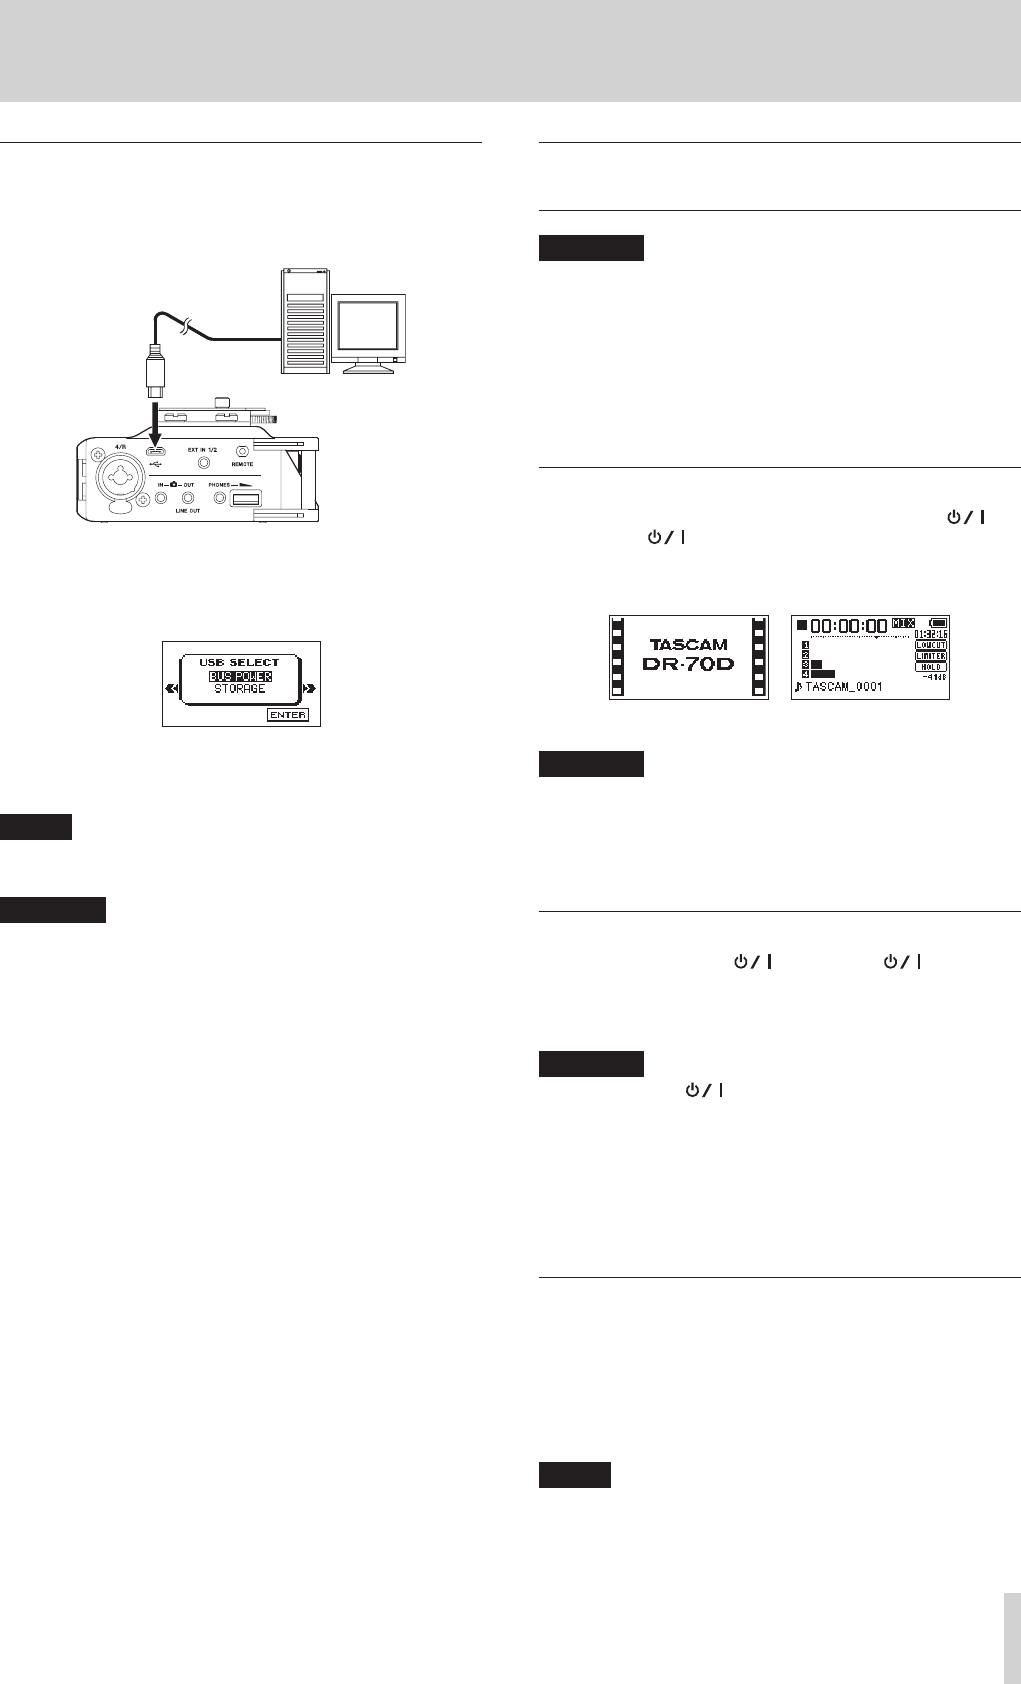
Connect the unit to a computer using the included USB cable as
shown in the illustration.
Connect the included USB
cable
microB USB plug
Computer
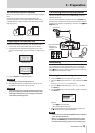
The
USB SELECT
screen appears when the unit is connected
by USB and when the unit is turned on if the USB cable is already
connected. On this screen, choose between USB bus power
supply or USB connection with the computer.
Turn the DATA dial to select
BUS POWER
and press the DATA
dial to start power supply through the USB port and return to
the Home Screen.
NOTE
Power is supplied from the USB port even if the connected
unit contains batteries (USB bus power prioritized).
CAUTION
•
Depending on the USB bus power specifications of the
computer, this unit might not function when connected
to a computer by USB cable. In this case, use a TASCAM
PS-P515U AC adapter (sold separately) or batteries.
•
This unit does not support computer power conservation
and sleep functions. When powering the unit using the USB
bus power of a computer, always turn such functions off.
Turning the unit on and off (putting it
in standby)
CAUTION
•
The unit enters standby mode if turned off when the unit is
operating on power from a TASCAM PS-P515U AC adapter
(sold separately) or a computer USB bus.
•
Turn down the volume of any monitoring system connected
to the unit before turning the unit on or off (standby).
•
Do not wear connected headphones when turning the unit
on or off. Noise could damage the speakers or harm your
hearing.
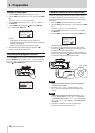
Turning the unit on
To start the unit when off (in standby), slide the HOLD/
switch toward until
TASCAM DR-70D
(Start-up Screen)
appears on the display.
The Home Screen appears after the unit starts up.
Start-up Screen Home Screen
CAUTION
When the unit is started up for the first time (or when
the built-in clock is reset after being left unused without
batteries), the
DATE/TIME
screen appears before the
Start-up Screen so you can adjust the date and time. (See
“Setting the date and time” on page 14.)
Turning the unit off (putting it in standby)
When on, slide the HOLD/ switch toward until
LINEAR PCM RECORDER
appears on the display.
The unit turns off (enters standby) after it completes its
shutdown process.
CAUTION
Always use the button to turn the unit off (put it in
standby).
Do not remove the batteries, disconnect the power
cable when using a TASCAM PS-P515U AC adapter (sold
separately) or disconnect the USB cable if using USB bus
power while the unit is operating. If you do so, recording
data and settings, for example, will all be lost. Lost data and
settings cannot be restored.
Resume function
This unit has a resume function. When turned on, the unit
locates to the position (time) where it was when turned off
previously.
After turning the unit on, press the 2/7 button to
resume playback from the file position (time) from when the
unit was shut down (put into standby).
NOTE
The required data for this function is stored in the SD card.
The resume function will not work if the card is changed or
formatted.


Find Your Products By Category
Please Login
