0

Out of 0 Ratings

Owner's of the Yamaha Music Mixer Yamaha Music Mixer gave it a score of 0 out of 5. Here's how the scores stacked up:
  • Reliability

    0 out of 5
  • Durability

    0 out of 5
  • Maintenance

    0 out of 5
  • Performance

    0 out of 5
  • Ease of Use

    0 out of 5
Page 39
of 56
 
Using Other Functions
MGP32X/MGP24X Owner’s Manual
38
8. Play the background music, and listen to con-
firm that the sound volume automatically turns
down when you speak into the microphone.
NOTE
The volume on the input source is detected after fader adjust-
ment. It is affected by the setting of the ON switch and/or the
channel fader.
Making detailed Ducker settings
1.
Press the SETUP button below the display
repeatedly if necessary until the (3/4) DUCKER
page appears.
2. Rotate Knob 1 to select the desired parameter,
and then rotate Knob 2 to set the parameter
value.
Each parameter lets you make the following settings.
Source: Selection of the signal used as an input source
Thresh (Threshold): Threshold level at which the Ducker
is applied
Range: The amount of attenuation while the Ducker is
being applied
Release: Time that elapses before the Ducker is disabled,
after the input signal has lowered below the threshold level
“#1” in the parameter name indicates CH29/30 {CH21/22},
and “#2” indicates CH31/32 {CH23/24}.
NOTE
For details about the parameters, refer to the Appendix (page
45).
Using the Leveler function
The Leveler function automatically maintains a consistent sound
volume, even when using sound sources that have different mas-
tering levels.
1. Connect a USB device or an audio player such
as an iPod/iPhone to the unit.
2. If you connect an audio player other than an
iPod/iPhone, adjust the input level according
to the softest part (lowest level) of the song.
Adjust the input level so that the PFL/AFL level meter indica-
tor only occasionally rises above the “0” level while the PFL
switch is on.
3. If a USB device is connected, turn on ( ) the
LEVELER switch of CH29/30 {CH21/22}. If an
iPod/iPhone is connected, turn on the LEV-
ELER switch of CH31/32 {CH23/24}.
Adjusting the Leveler settings
1.
Press the SETUP button below the display
repeatedly if necessary until the (4/4) LEV-
ELER page appears.
2. Rotate Knob 1 to select the desired parameter,
and then rotate Knob 2 to set the parameter
value.
Each parameter lets you make the following settings.
Thresh (Threshold): Threshold level at which the Leveler
is applied
OutGain: Output level of the Leveler
“#1” in the parameter name indicates CH29/30 {CH21/22},
and “#2” indicates CH31/32 {CH23/24}.
NOTE
For details about the parameters, refer to the Appendix (page
45).
Release
Range
Output sound volume
Time
When the volume of the
DUCKER SOURCE exceeds
the threshold
When the volume of the
DUCKER SOURCE drops
below the threshold
Turn on
MGP32X/MGP24X Owner’s Manual
39
Using Other Functions
Initializing the unit to the factory
default settings (resetting user mem-
ory)
The MGP32X/MGP24X unit has a function to reset user memory
by initializing the unit to the factory default settings. The parame-
ter settings and user programs will be reset to the factory default
settings.
NOTICE
When user memory is initialized, all the parameter settings
and user programs in the current user memory will be
overwritten with the factory default settings. Proceed with
the following operation only if you are very sure you want
to do this.
1. Make sure that the power of the unit is set to
off.
2. Turn on the power switch while holding down
both the FX1 and the SETUP buttons.
The following MESSAGE screen appears when initialization
is complete. Hold down both the FX1 and SETUP buttons
until the MESSAGE screen appears.
3. Press Knob 2 to close the screen, or wait until
the MESSAGE screen automatically closes.
The display returns to the normal HOME screen.
NOTICE
Do not turn off the power while initialization is in progress.
MGP32X/MGP24X Owner’s Manual
40
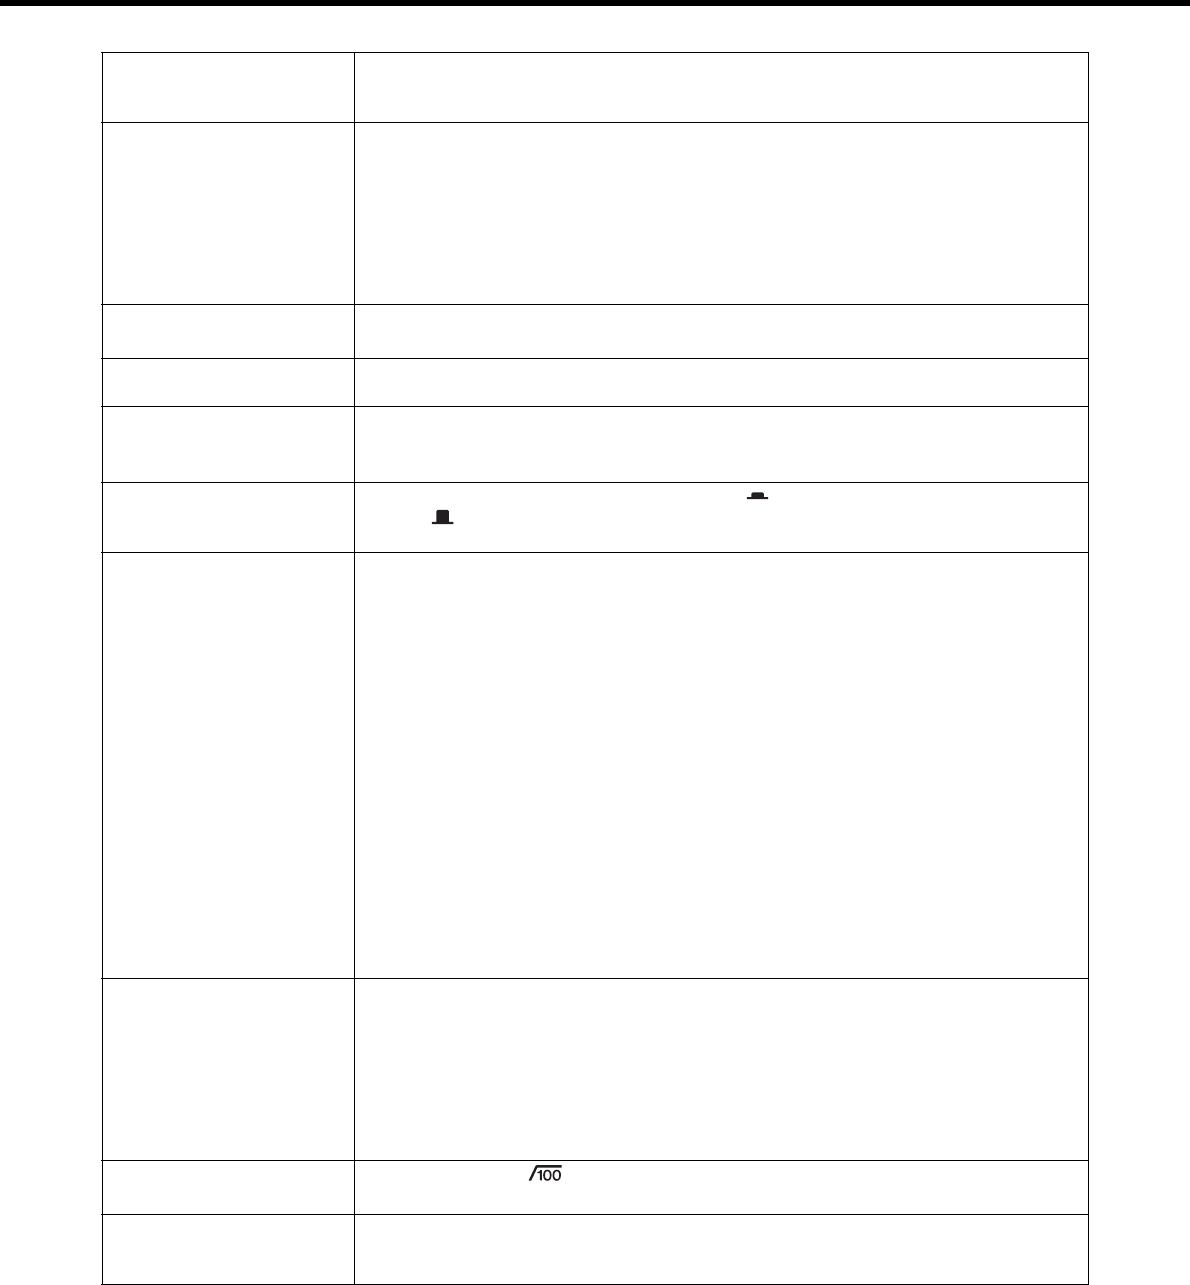
Troubleshooting
Power doesn’t come on. Is an independent power-supply unit such as a power generator, or a power strip with switch
plugged into the mixer?
Make sure that the power is turned on.
No sound. Are microphones, external devices, and speakers connected correctly?
Is a Y-shaped cable used to connect the INSERT connector or an external device?
Are your cables connected properly, or are they shorted or faulty?
Are the channel GAIN knobs, channel faders, STEREO master fader and GROUP faders set
to appropriate levels?
Are the bus assign switch and switches in the USB IN section and in the iPod IN section set
properly?
No sound from the STE-
REO OUT jacks
Are the ON switch and ST switch of the channels you are using turned ON?
Is the ON switch of the STEREO master turned on?
No sound from the AUX1
to AUX6 jacks
Are the respective SEND MASTER knob, AUX1 to AUX6 knobs, FX1 and FX2 knobs of each
channel set to appropriate levels?
No sound from the MONI-
TOR OUT and/or PHONES
jacks
Are the PFL switches for the channels that you are not using turned on? Make sure to turn off
the PFL switch.
Is the AFL switch of the bus channel you want to monitor turned on?
No sound from the CH29/
30, CH31/32 {CH21/22,
CH23/24} jacks
Is the input select switch set to USB IN/iPod IN ( )? Make sure to set the switch to ANA-
LOG ( ).
Sound is faint, distorted,
or noisy.
Are the channel GAIN knobs, channel faders, STEREO master fader and GROUP faders set
to appropriate levels?
Is the 26dB switch turned on?
Make sure to turn off the switch when a low-level source, such as a microphone, is input.
Is the output signal from the connected device set to an appropriate level?
Are you applying the effects and compressor at appropriate levels?
You may have to lower the FX1, FX2 knobs, FX RTN fader, and COMP knob levels.
Are two different instruments connected to the XLR-type and phone jacks, or to the phone and
RCA pin jacks on one channel?
Make sure to connect to only one of these jacks on each channel.
Are microphones connected to the INPUT A input jacks?
If you are using condenser microphones, is the +48V switch turned ON?
If you are connecting a device which has a specified output level of +4dBu, turn on the 26dB
(PAD) switch of the mono channels or use stereo channels.
(Stereo channel) Is the DUCKER switch turned on?
When a signal is constantly input to CH24 {CH16} or the GROUP 1 bus, the sound becomes
faint.
No effect is applied. Check that the FX1 and FX2 knobs on each channel are adjusted correctly.
Check whether the ON button of the FX1 RTN and/or FX2 RTN channel is turned on.
Be sure that Knob 2, and the FX1 RTN and/or FX2 RTN faders are correctly adjusted.
Check that the switch for the desired bus in the FX1 RTN and/or FX2 RTN bus assign
switches is turned on.
When an effects processing unit is connected to the SEND(AUX1 to AUX6) jacks, are the
AUX1 to AUX6 knobs on the SEND MASTER set to appropriate levels?
I want spoken words to be
heard more clearly.
Make sure that the switch is turned ON.
Are the equalizers (HIGH, MID, and LOW knobs) on each channel adjusted appropriately?
I want to output a monitor
signal for the mixer
through speakers.
Connect a powered speaker to the MONITOR OUT jack.
Make sure to adjust the level of output signal from the MONITOR OUT jack with the MONI-
TOR knob.
null
  • Add more products to collection
  • Add more products to collection
  • Add more products to collection
  • Add more products to collection
  • Add more products to collection
  • Add more products to collection
  • Add more products to collection
-

Find a Product